Dette innholdet er foreløpig bare tilgjengelig på engelsk.
SharePoint Integration Setup
Overview
Findable connects to your Microsoft SharePoint using the Microsoft Graph API. Once connected, Findable monitors the SharePoint sites, drives, or folders you choose and mirrors documents into the Findable platform for AI-powered classification, search, and organization.
Here’s what happens under the hood:
- Findable stores one encrypted Microsoft app credential set for your organization
- Findable registers a subscription for each SharePoint site and drive connected to a building
- When files are added or changed in SharePoint, Findable is notified automatically
- Documents are imported and processed by Findable’s AI: classified, tagged, and made searchable
- If export is enabled, Findable can also write processed documents and metadata back to SharePoint
Findable respects Microsoft’s API rate limits and processes changes on a per-tenant basis to ensure reliability.
Security & Permissions
Findable authenticates to the Microsoft Graph API via an App Registration in your Microsoft Entra ID (formerly Azure AD). Your IT team controls exactly what Findable can access.
Two access modes
| Mode | Permission | What it does |
|---|---|---|
| Full Access | Sites.Read.All | Read access to all SharePoint sites in your tenant. Use Sites.ReadWrite.All if Findable should also write files/metadata back to SharePoint. |
| Limited Access | Sites.Selected | Access only the specific SharePoint sites you explicitly grant. Recommended for organizations that want granular control. |
How authentication works: A client secret is created for the app registration. This secret is encrypted at rest and only shared with Microsoft’s token service to obtain access tokens. All subsequent API requests use these short-lived tokens.
Setup Guide
You’ll need an administrator of your organization’s Microsoft Entra ID to complete these steps. The entire process takes about 15 minutes.
Step 1: Create the App Registration
-
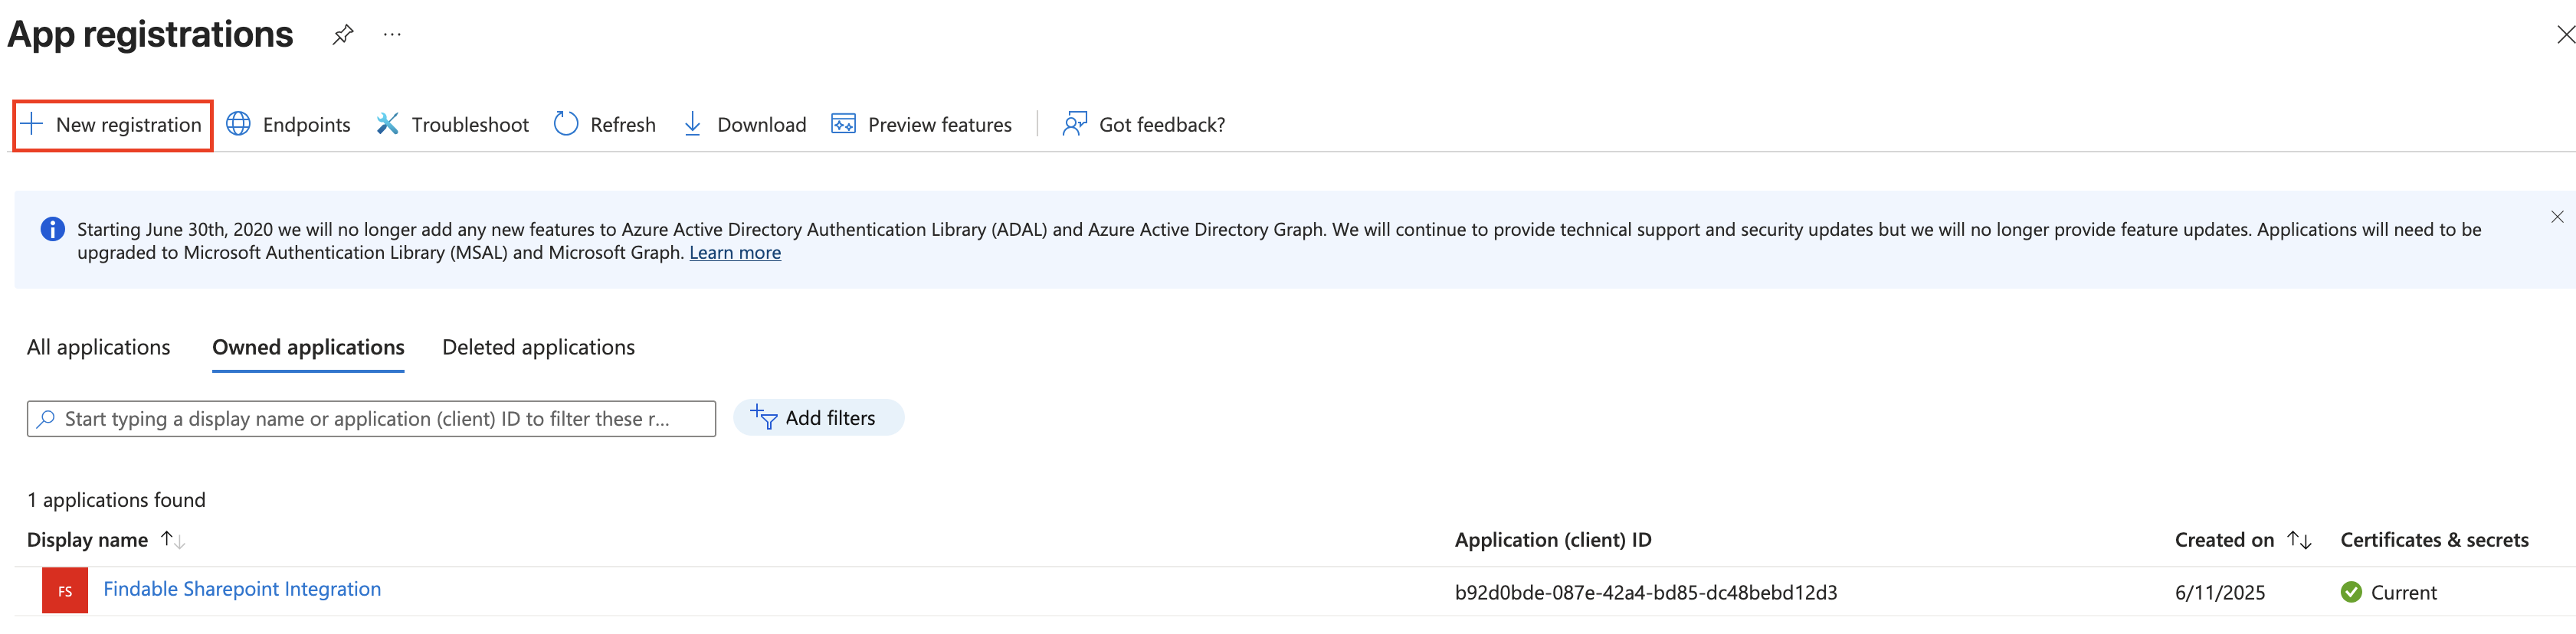
Sign in to the Microsoft Entra admin center and navigate to App registrations → New registration.
-
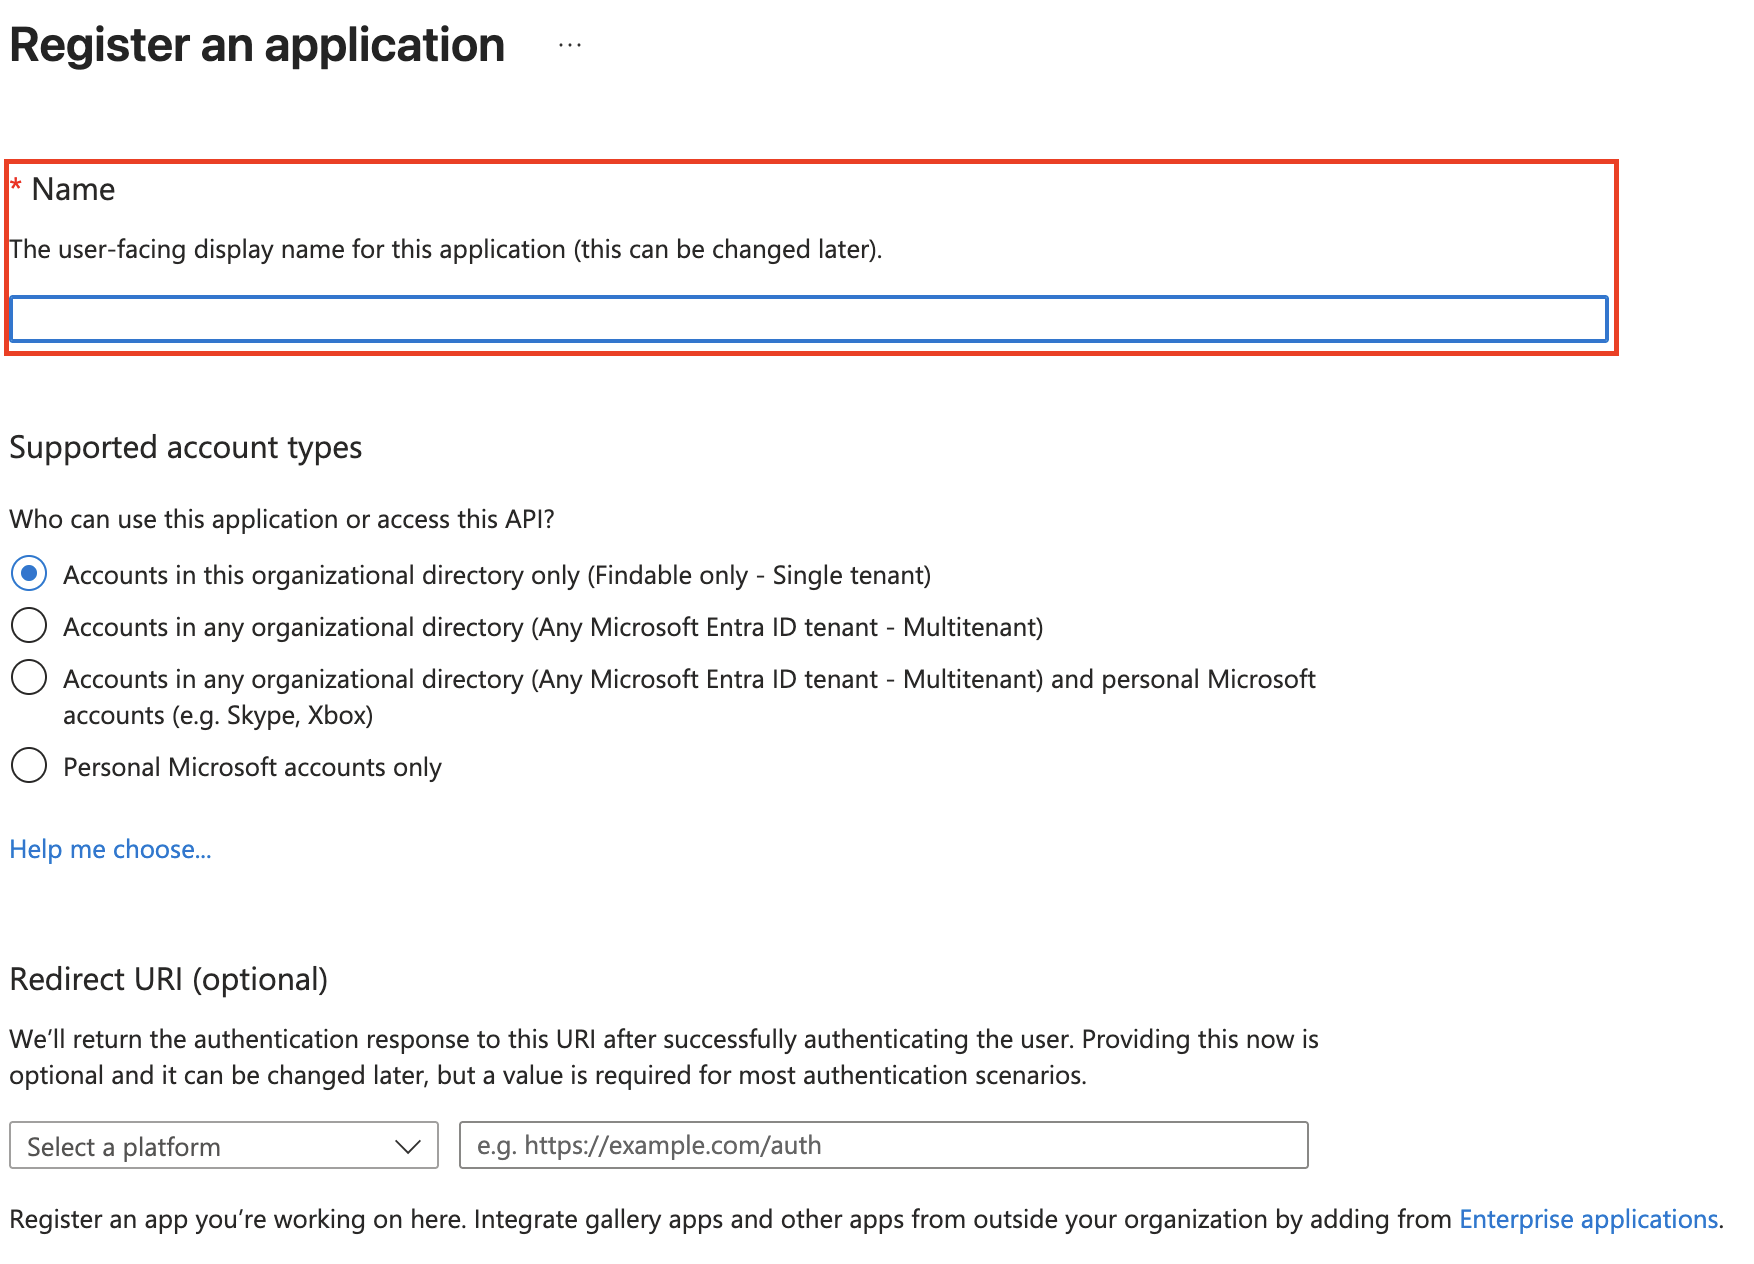
Give the application a name (e.g., “Findable SharePoint Integration”) and keep the default values for the remaining fields. Click Register.
Make note of the Application (client) ID. You’ll need this later.
-
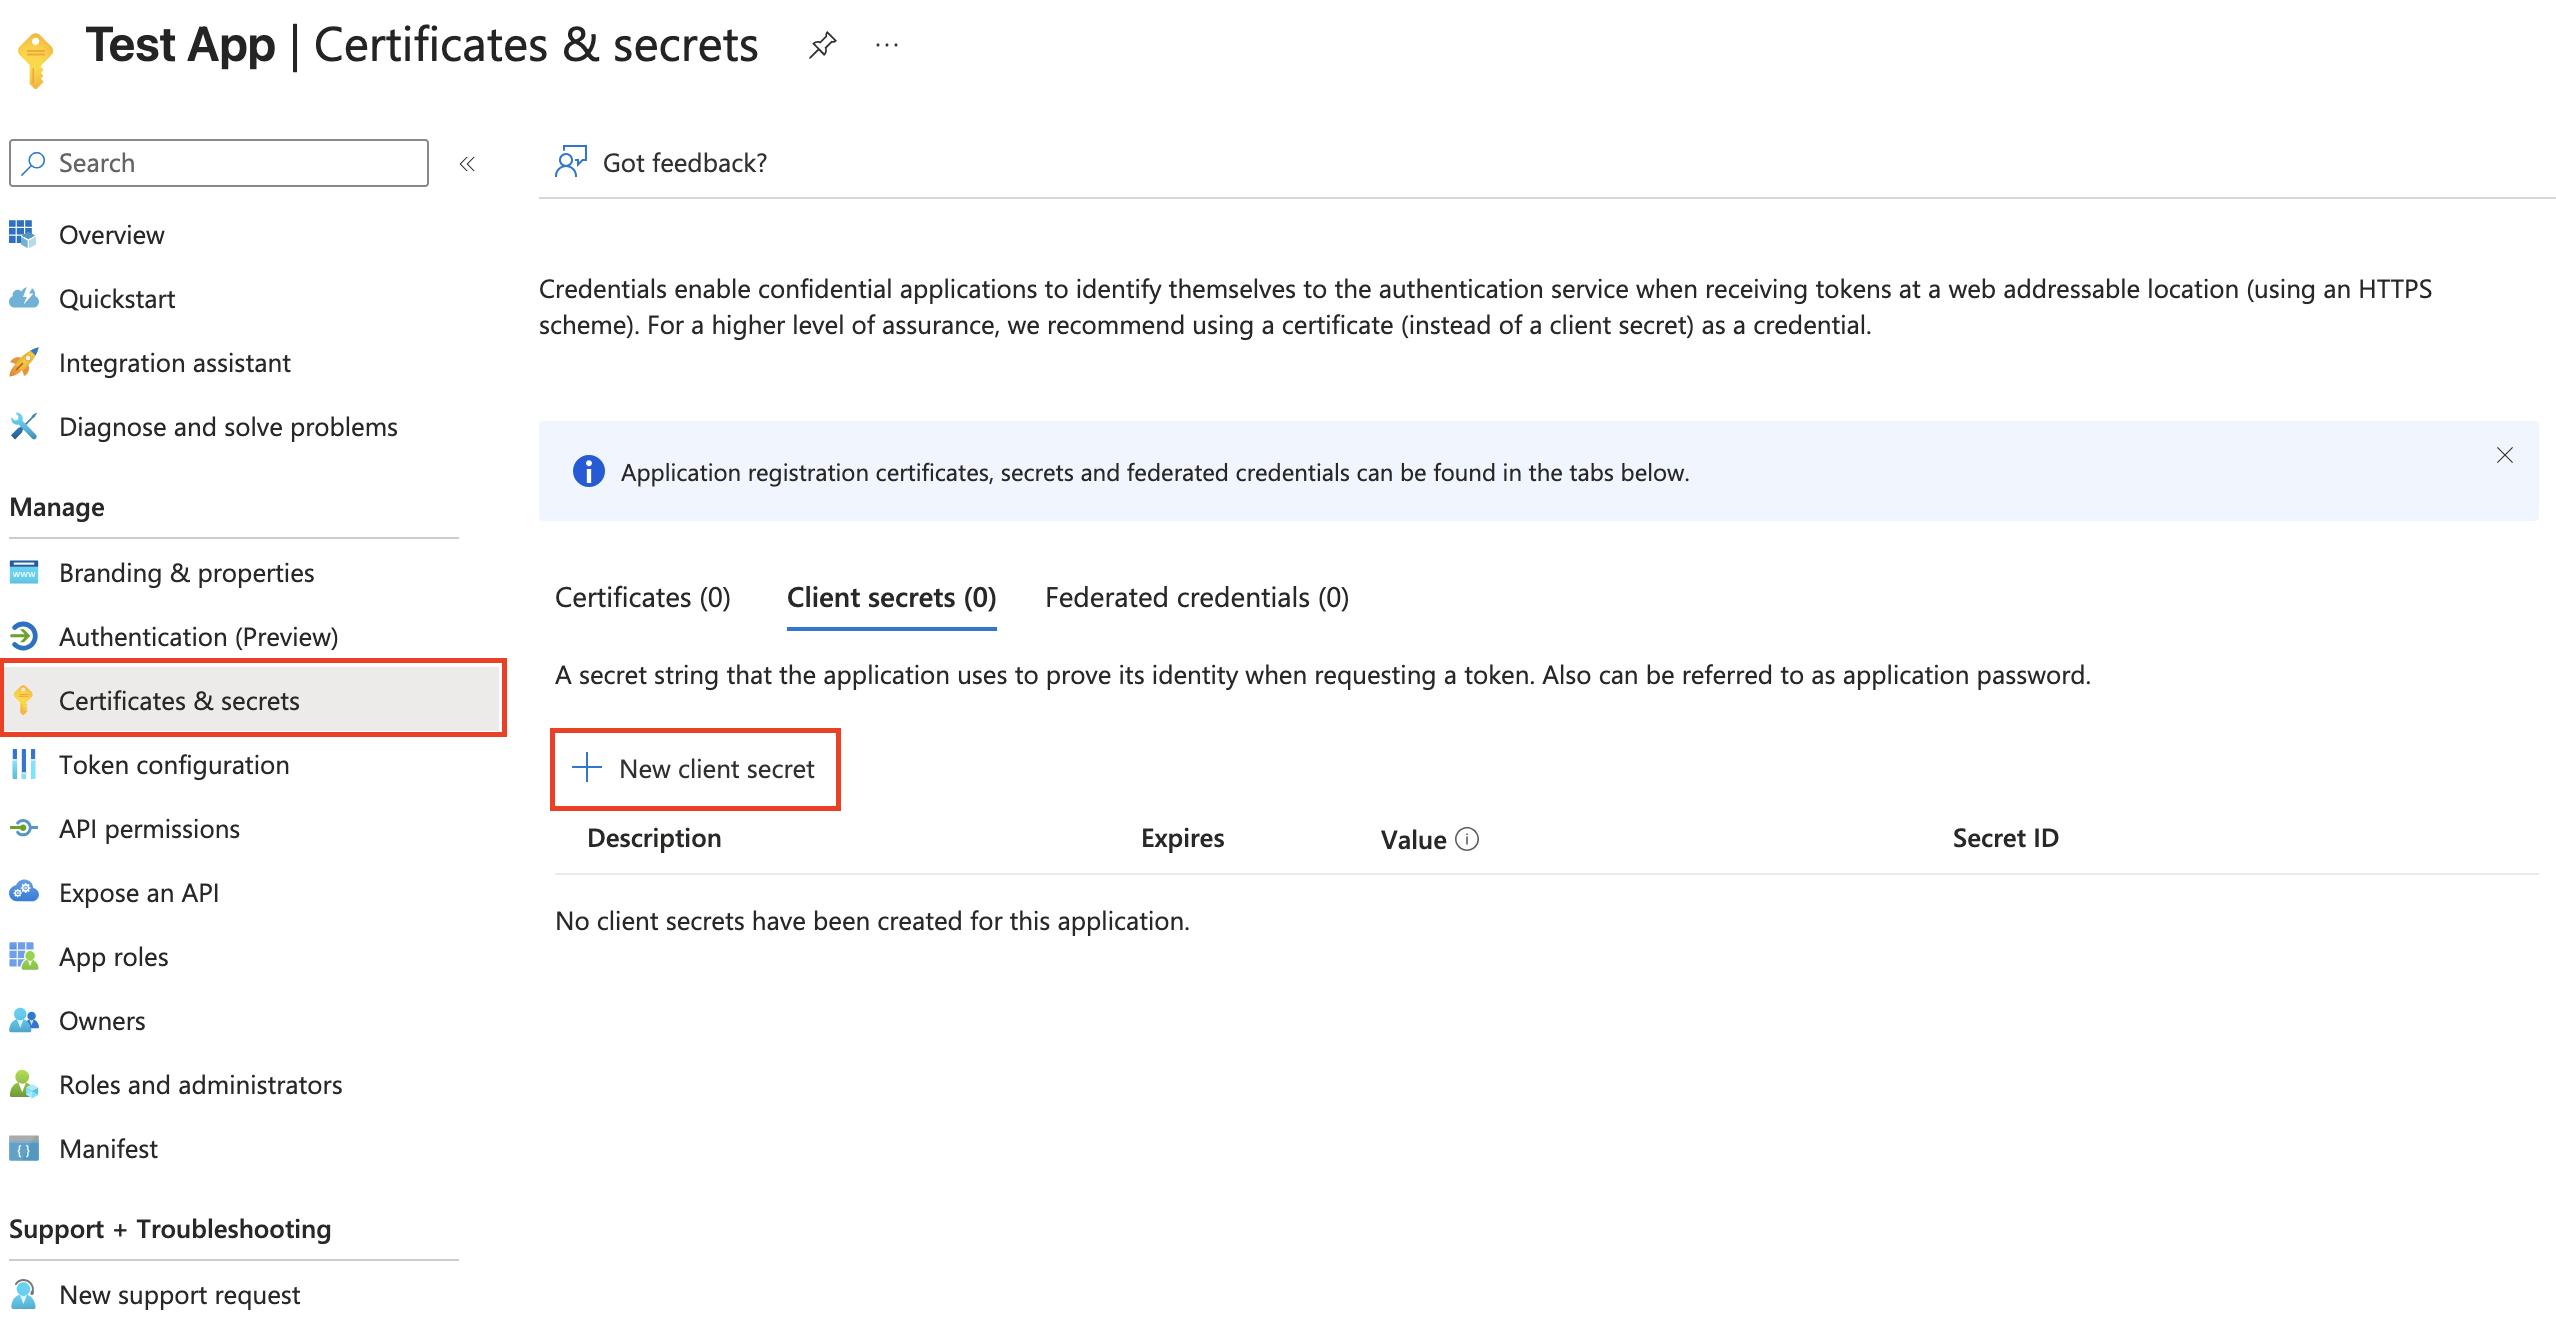
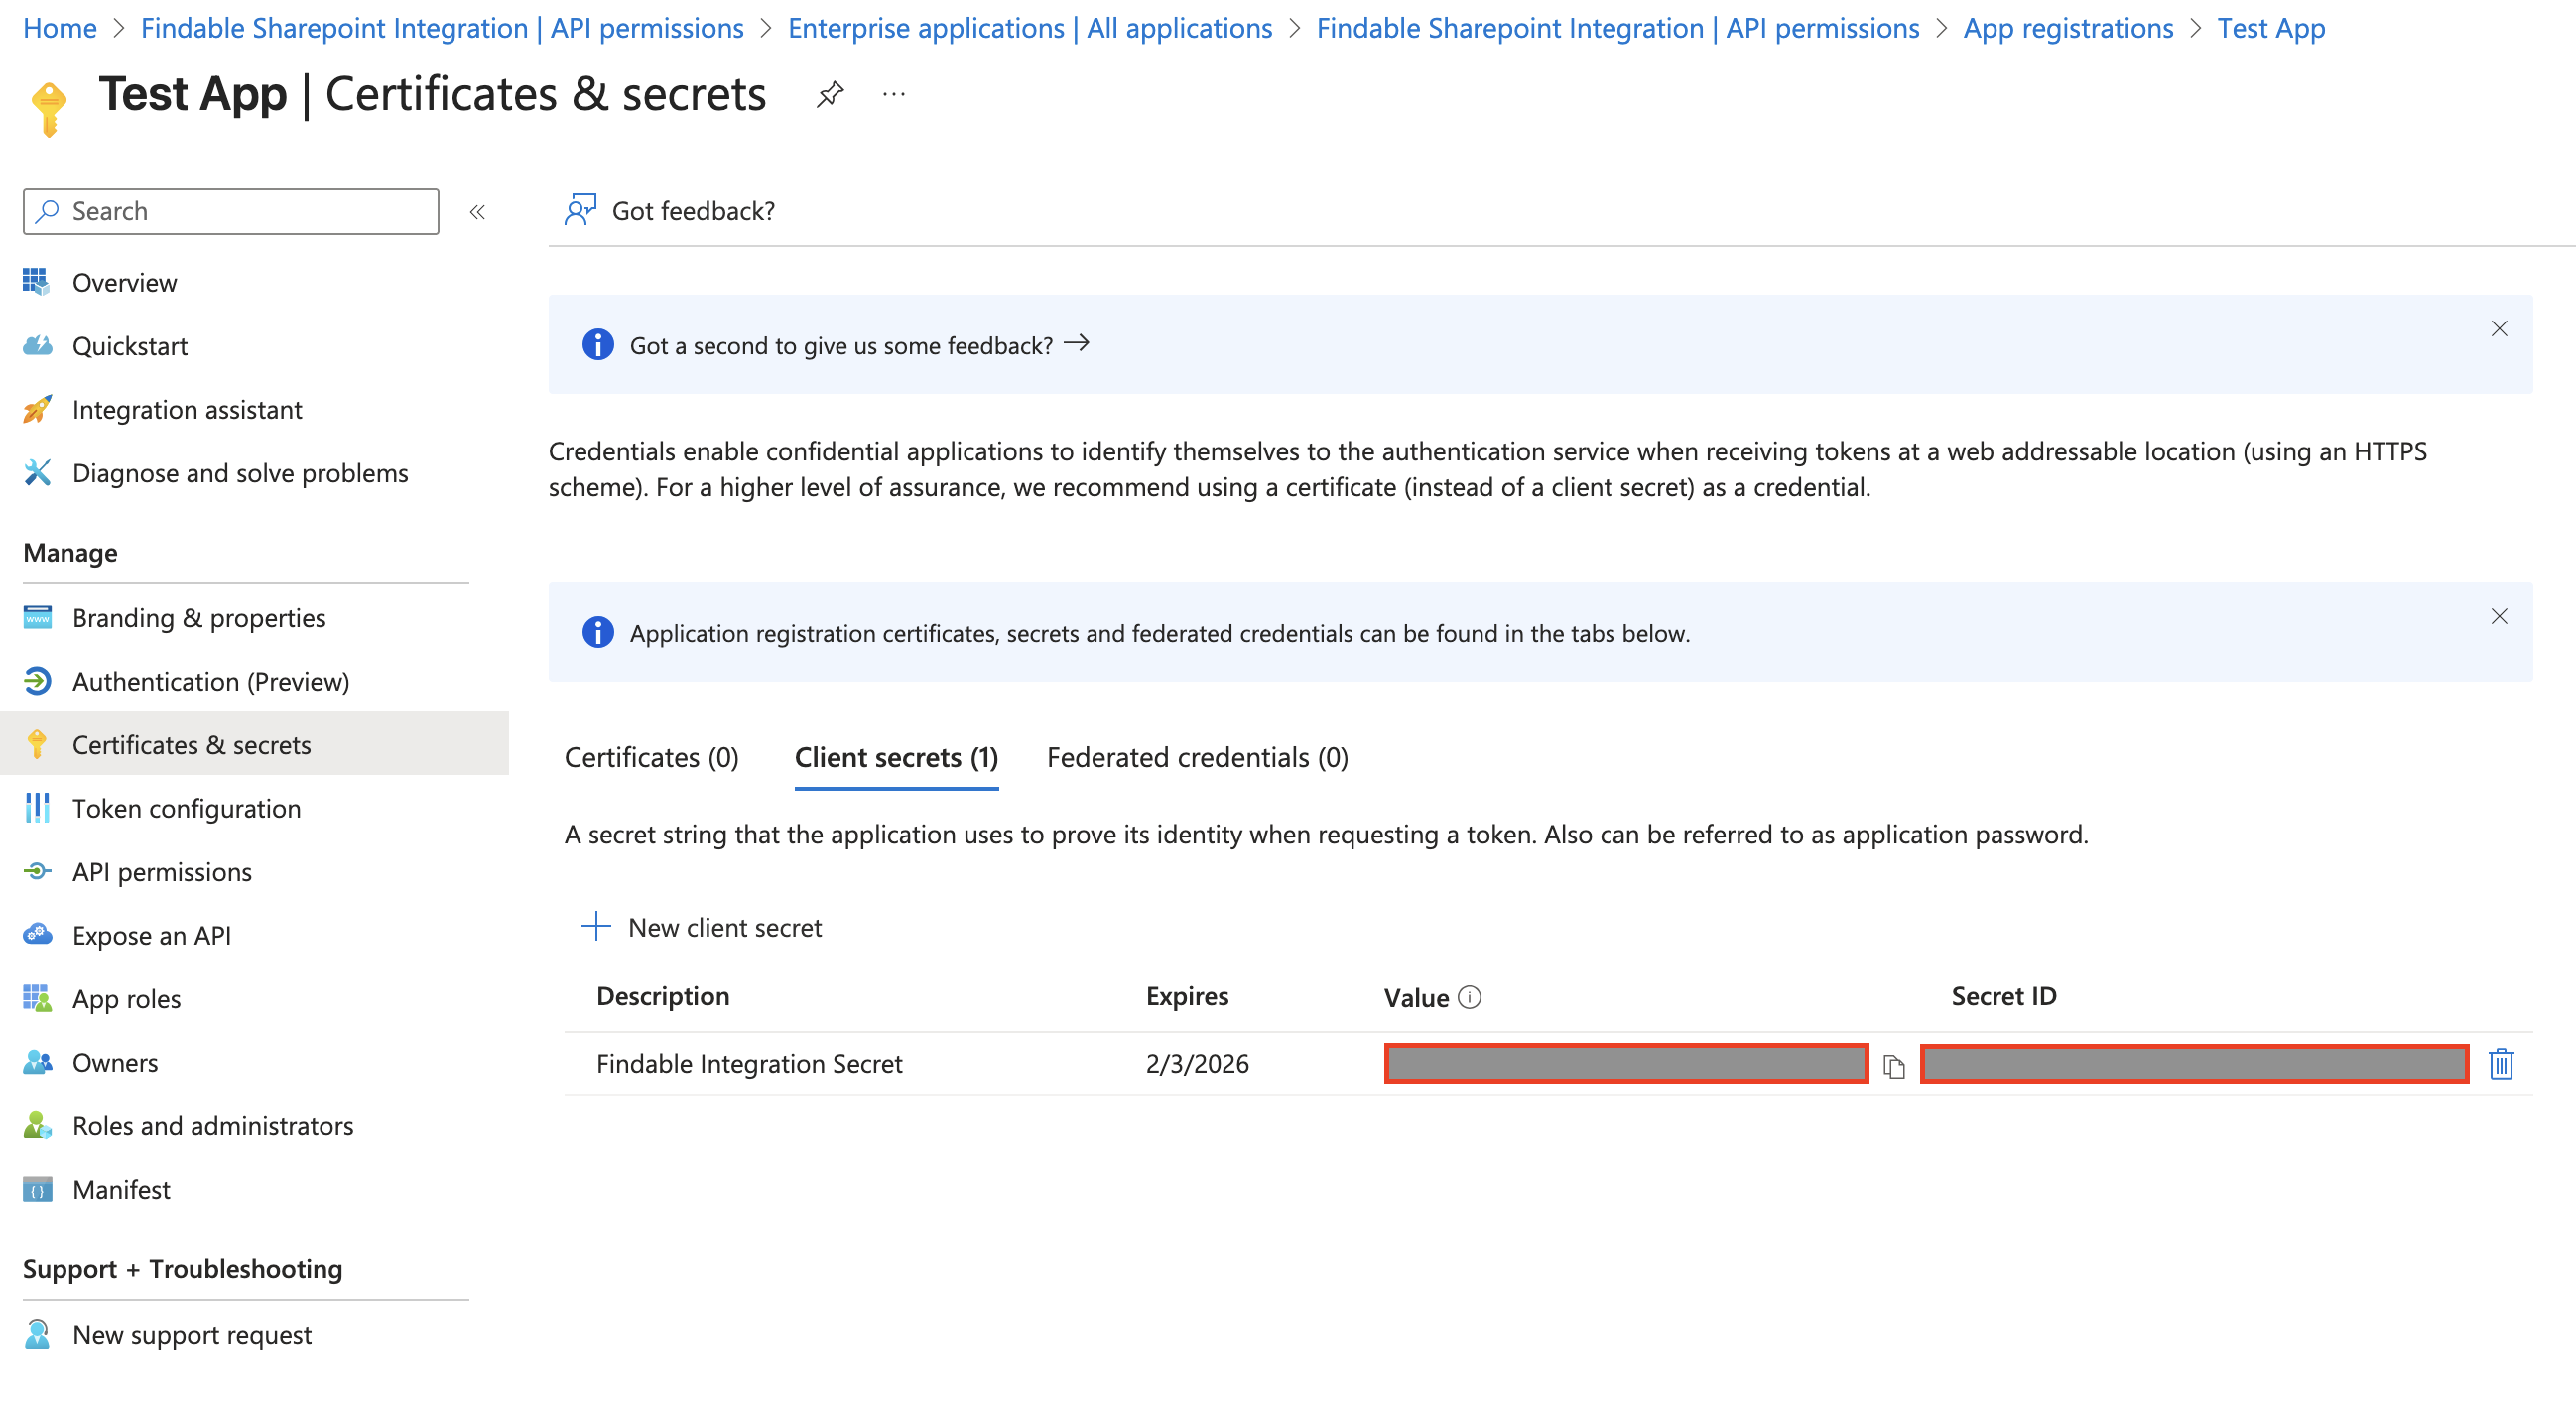
Navigate to Certificates & secrets in the left sidebar, then click New client secret.
-
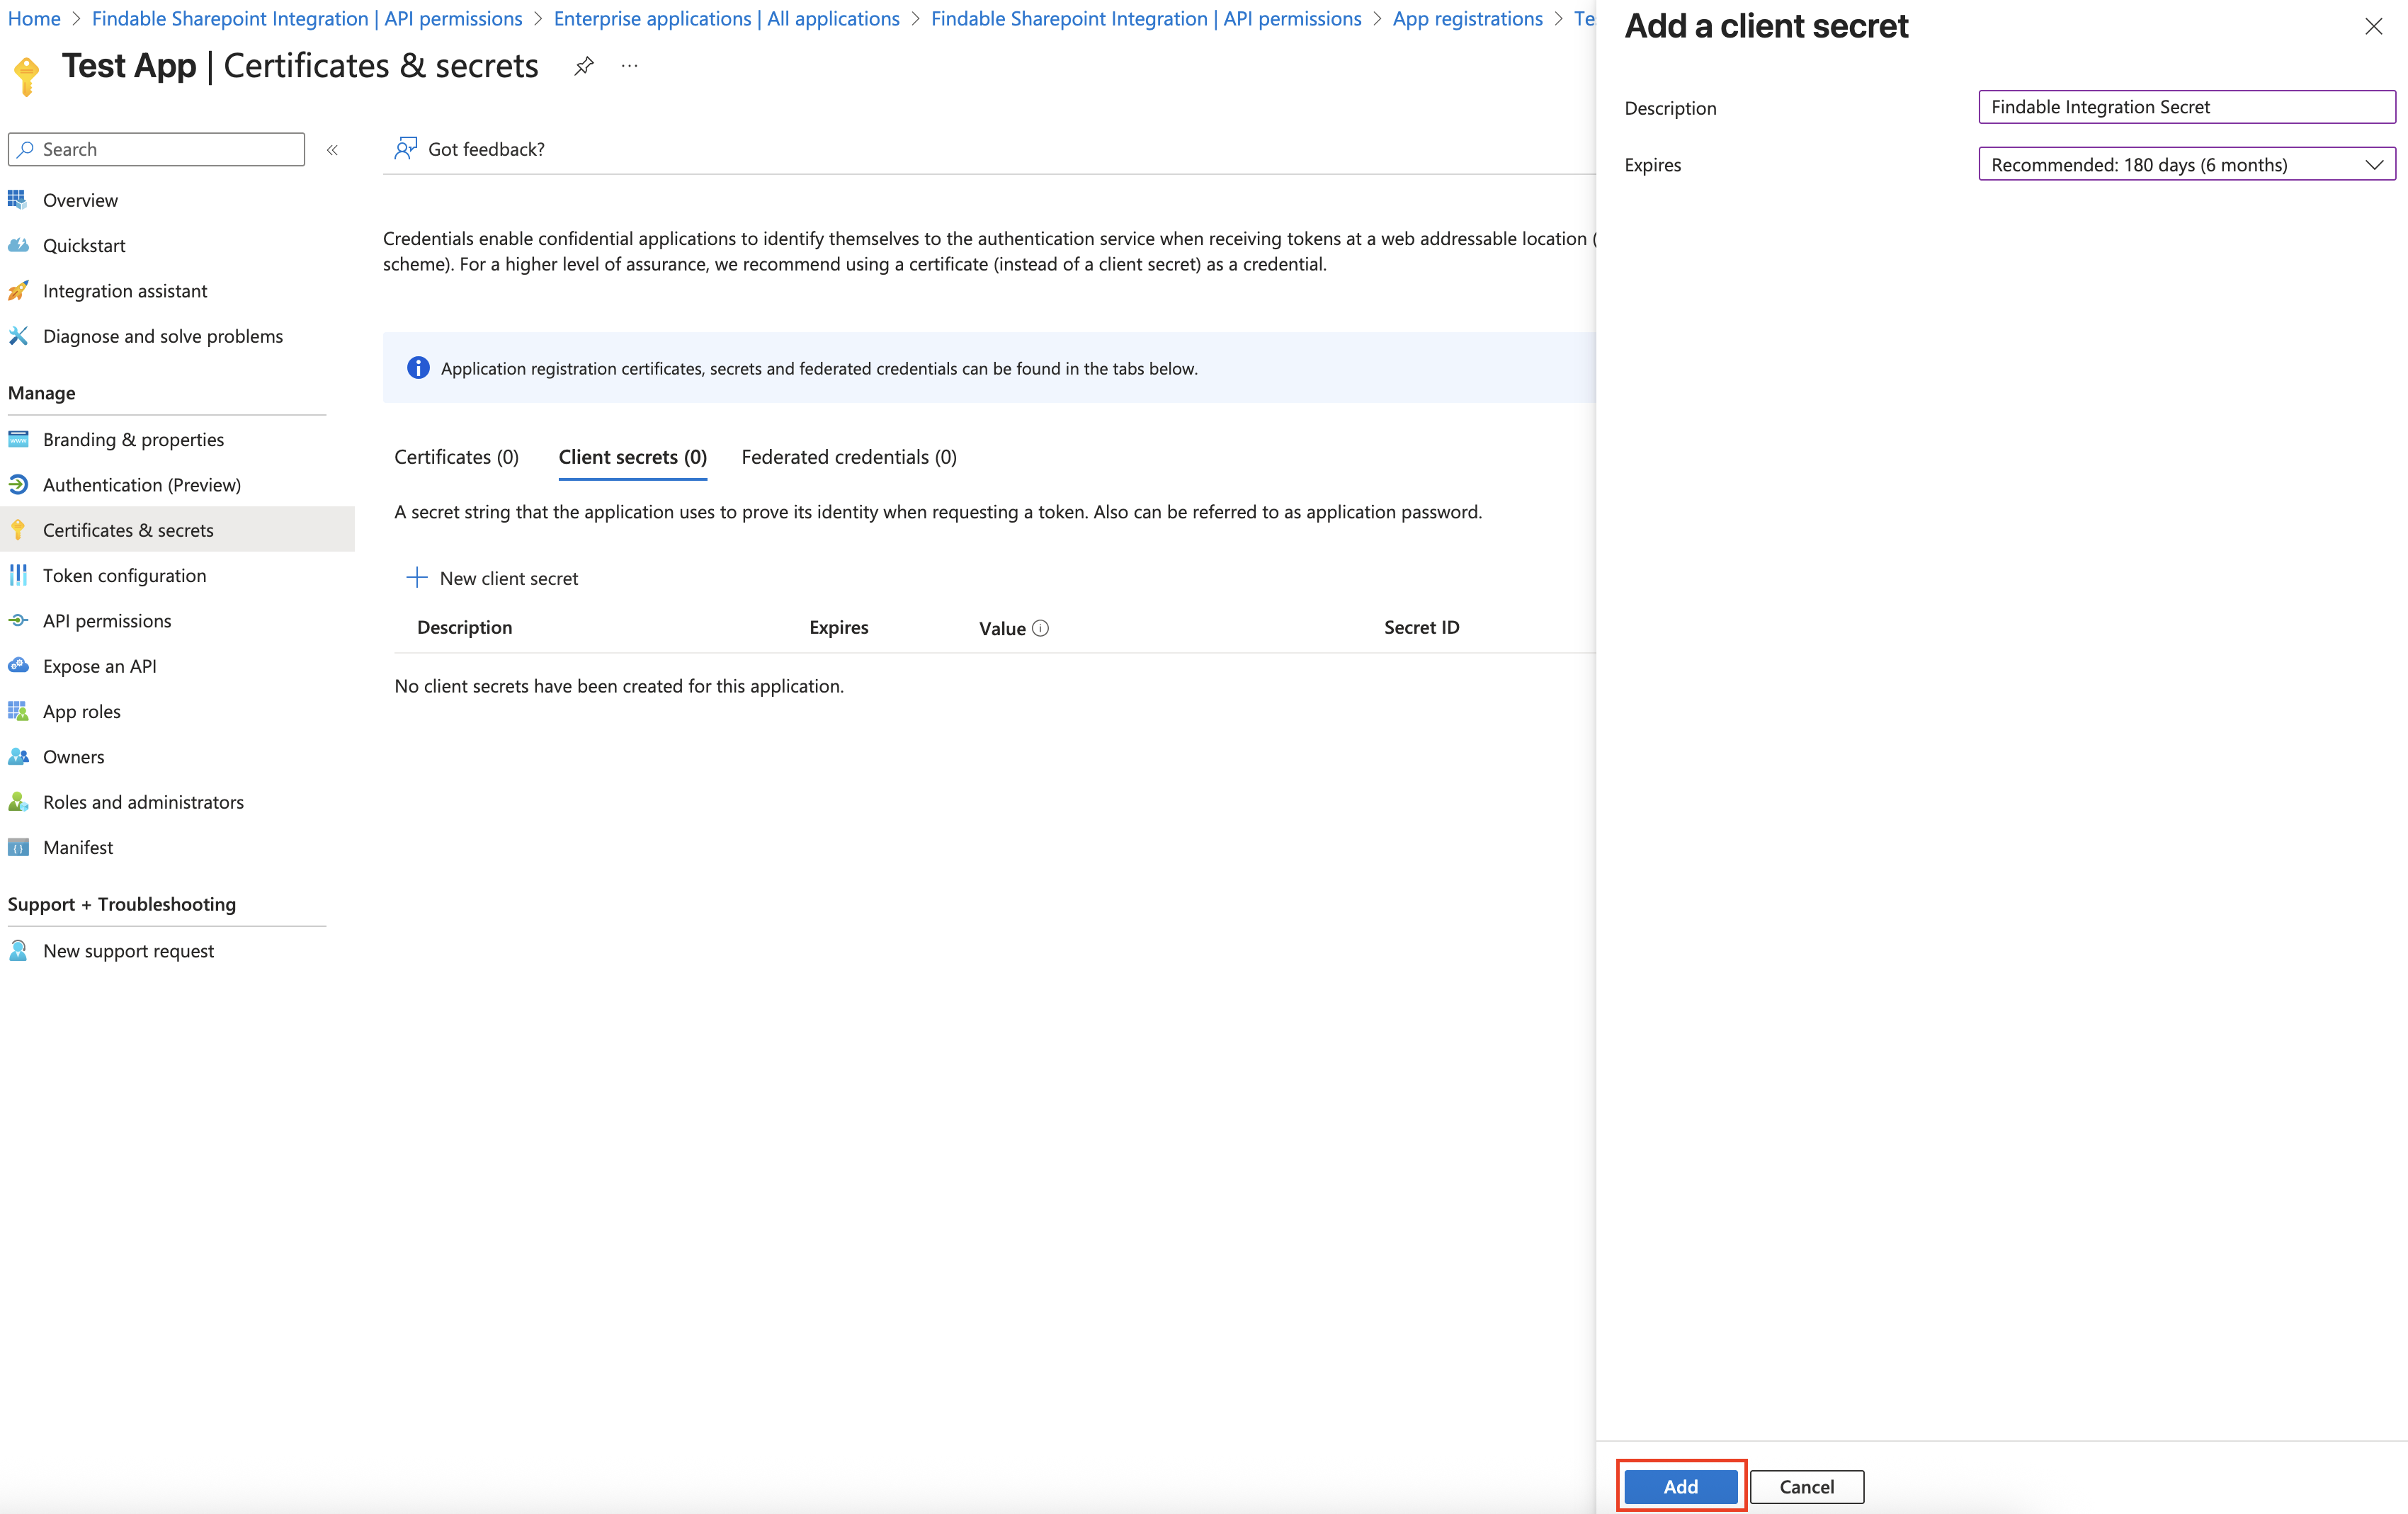
Add a description (e.g., “Findable integration”) and select an expiration period. Click Add.
-
Important: Copy the Value of the client secret immediately. This is only shown once. Also note the Secret ID.
Step 2: Grant API Permissions
-
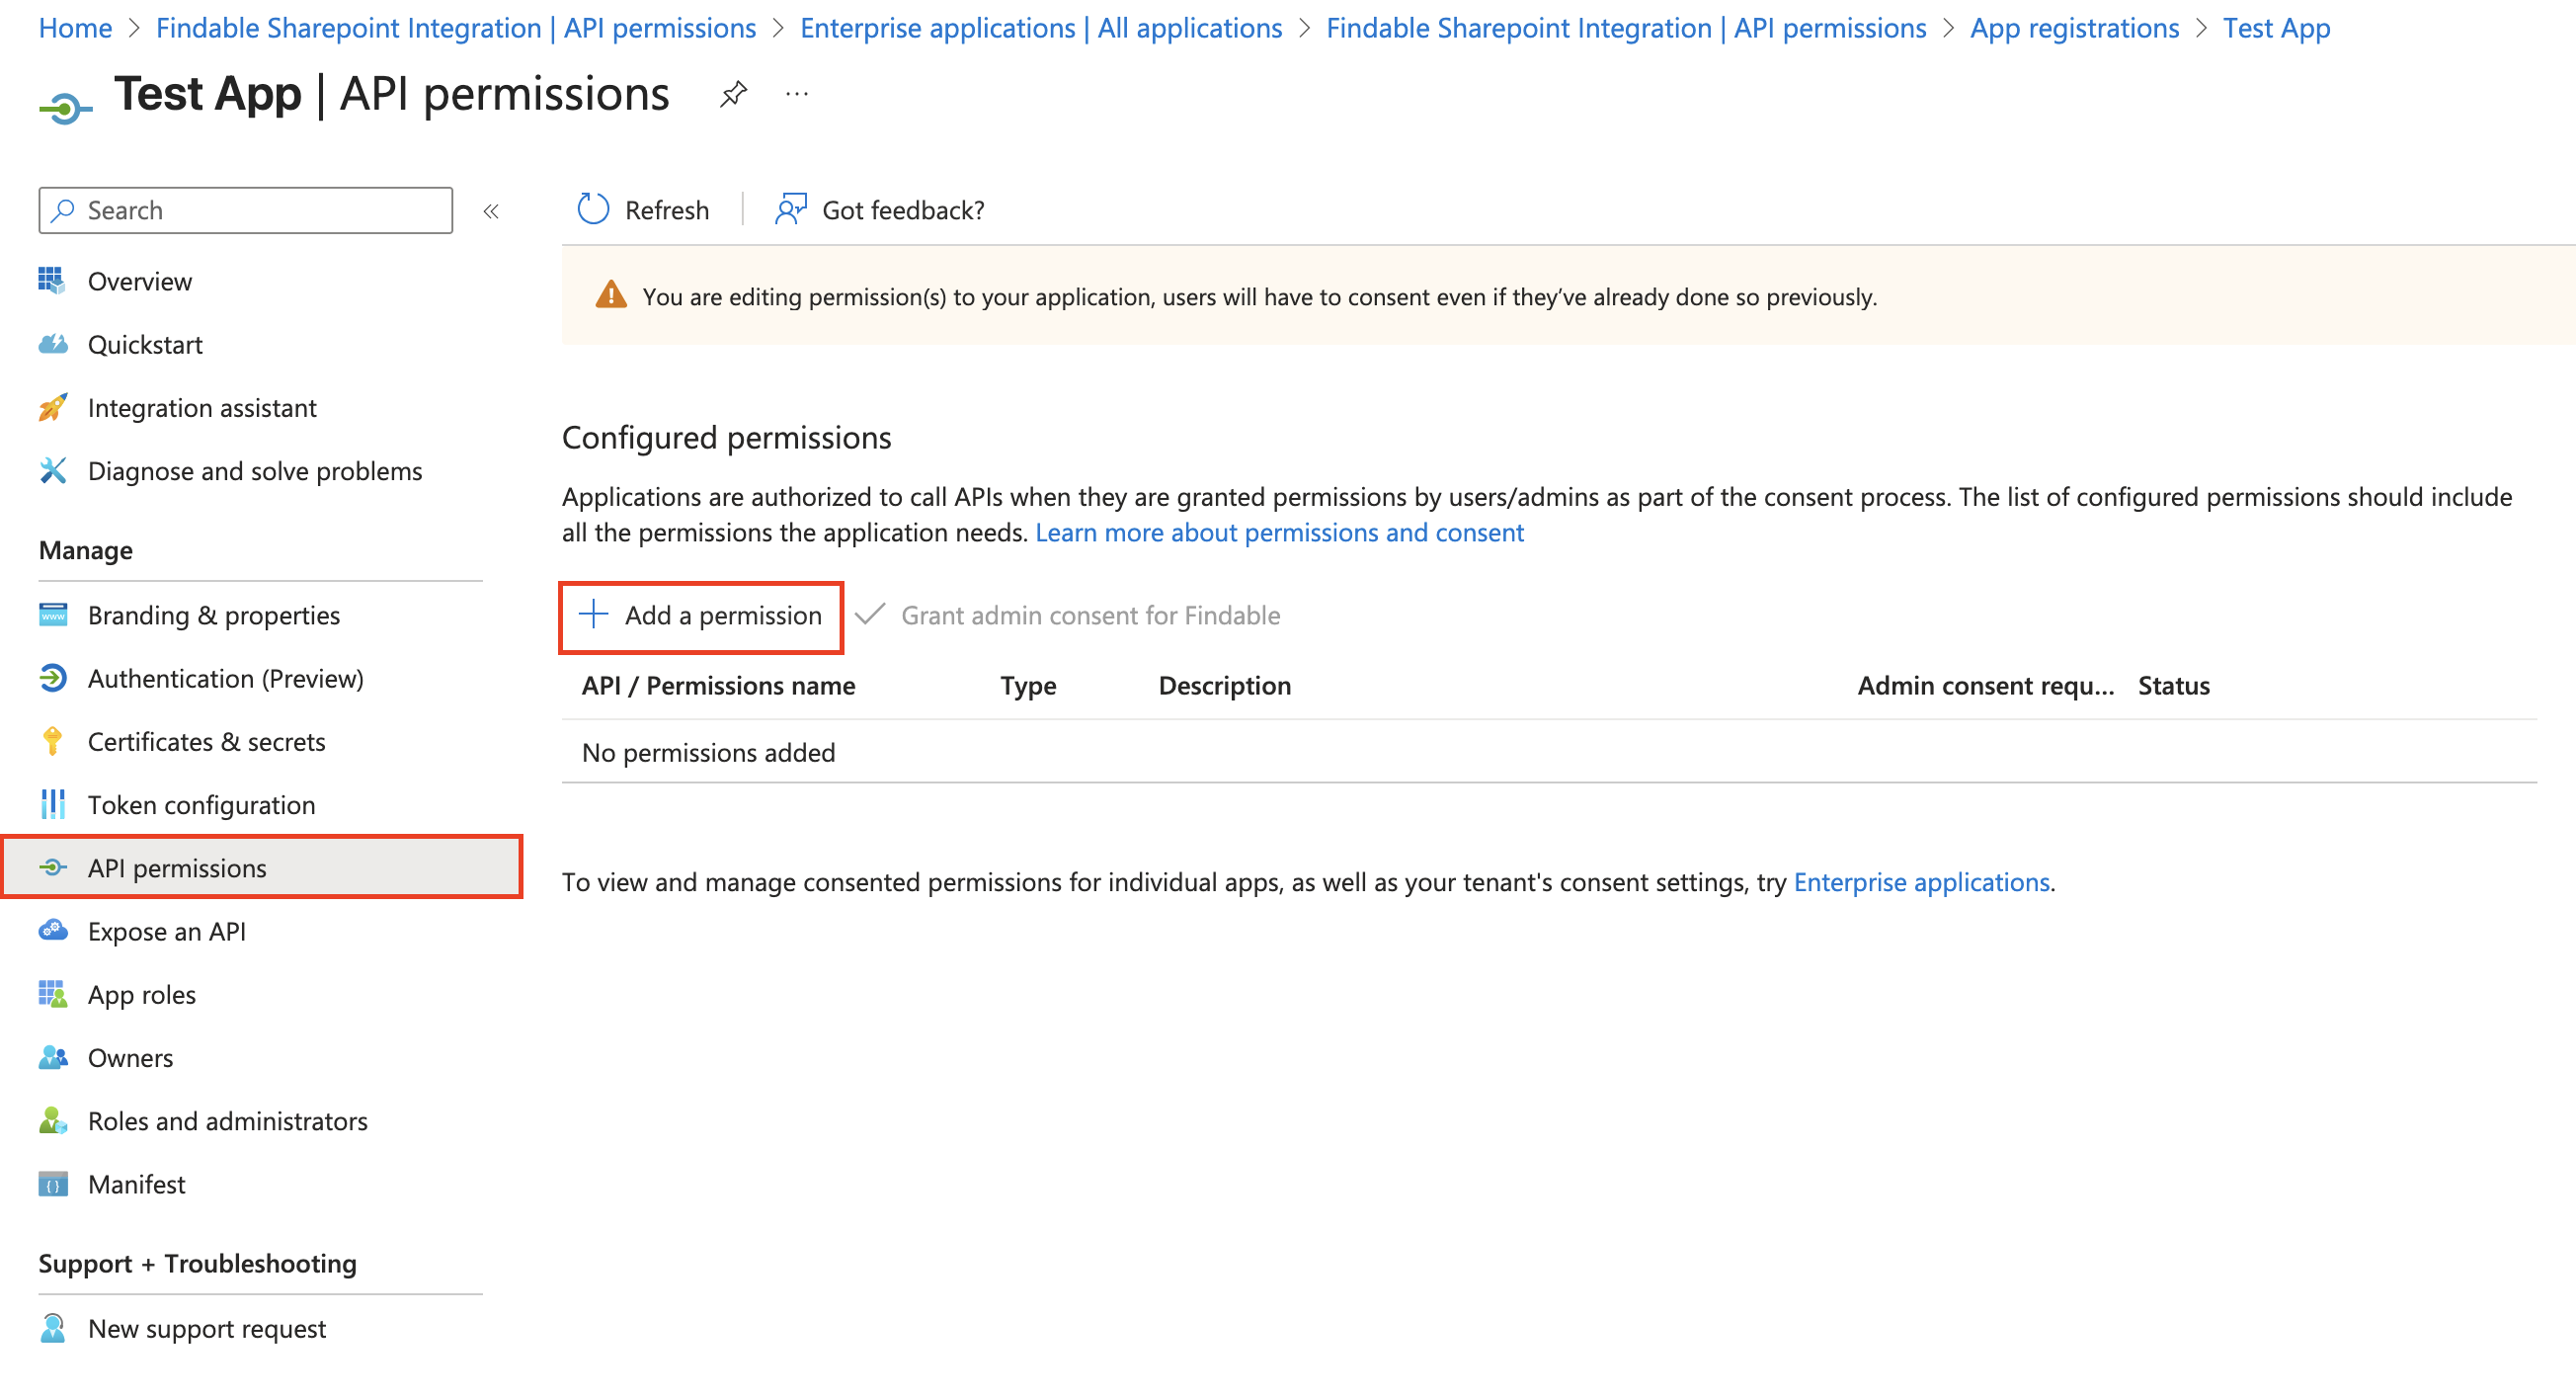
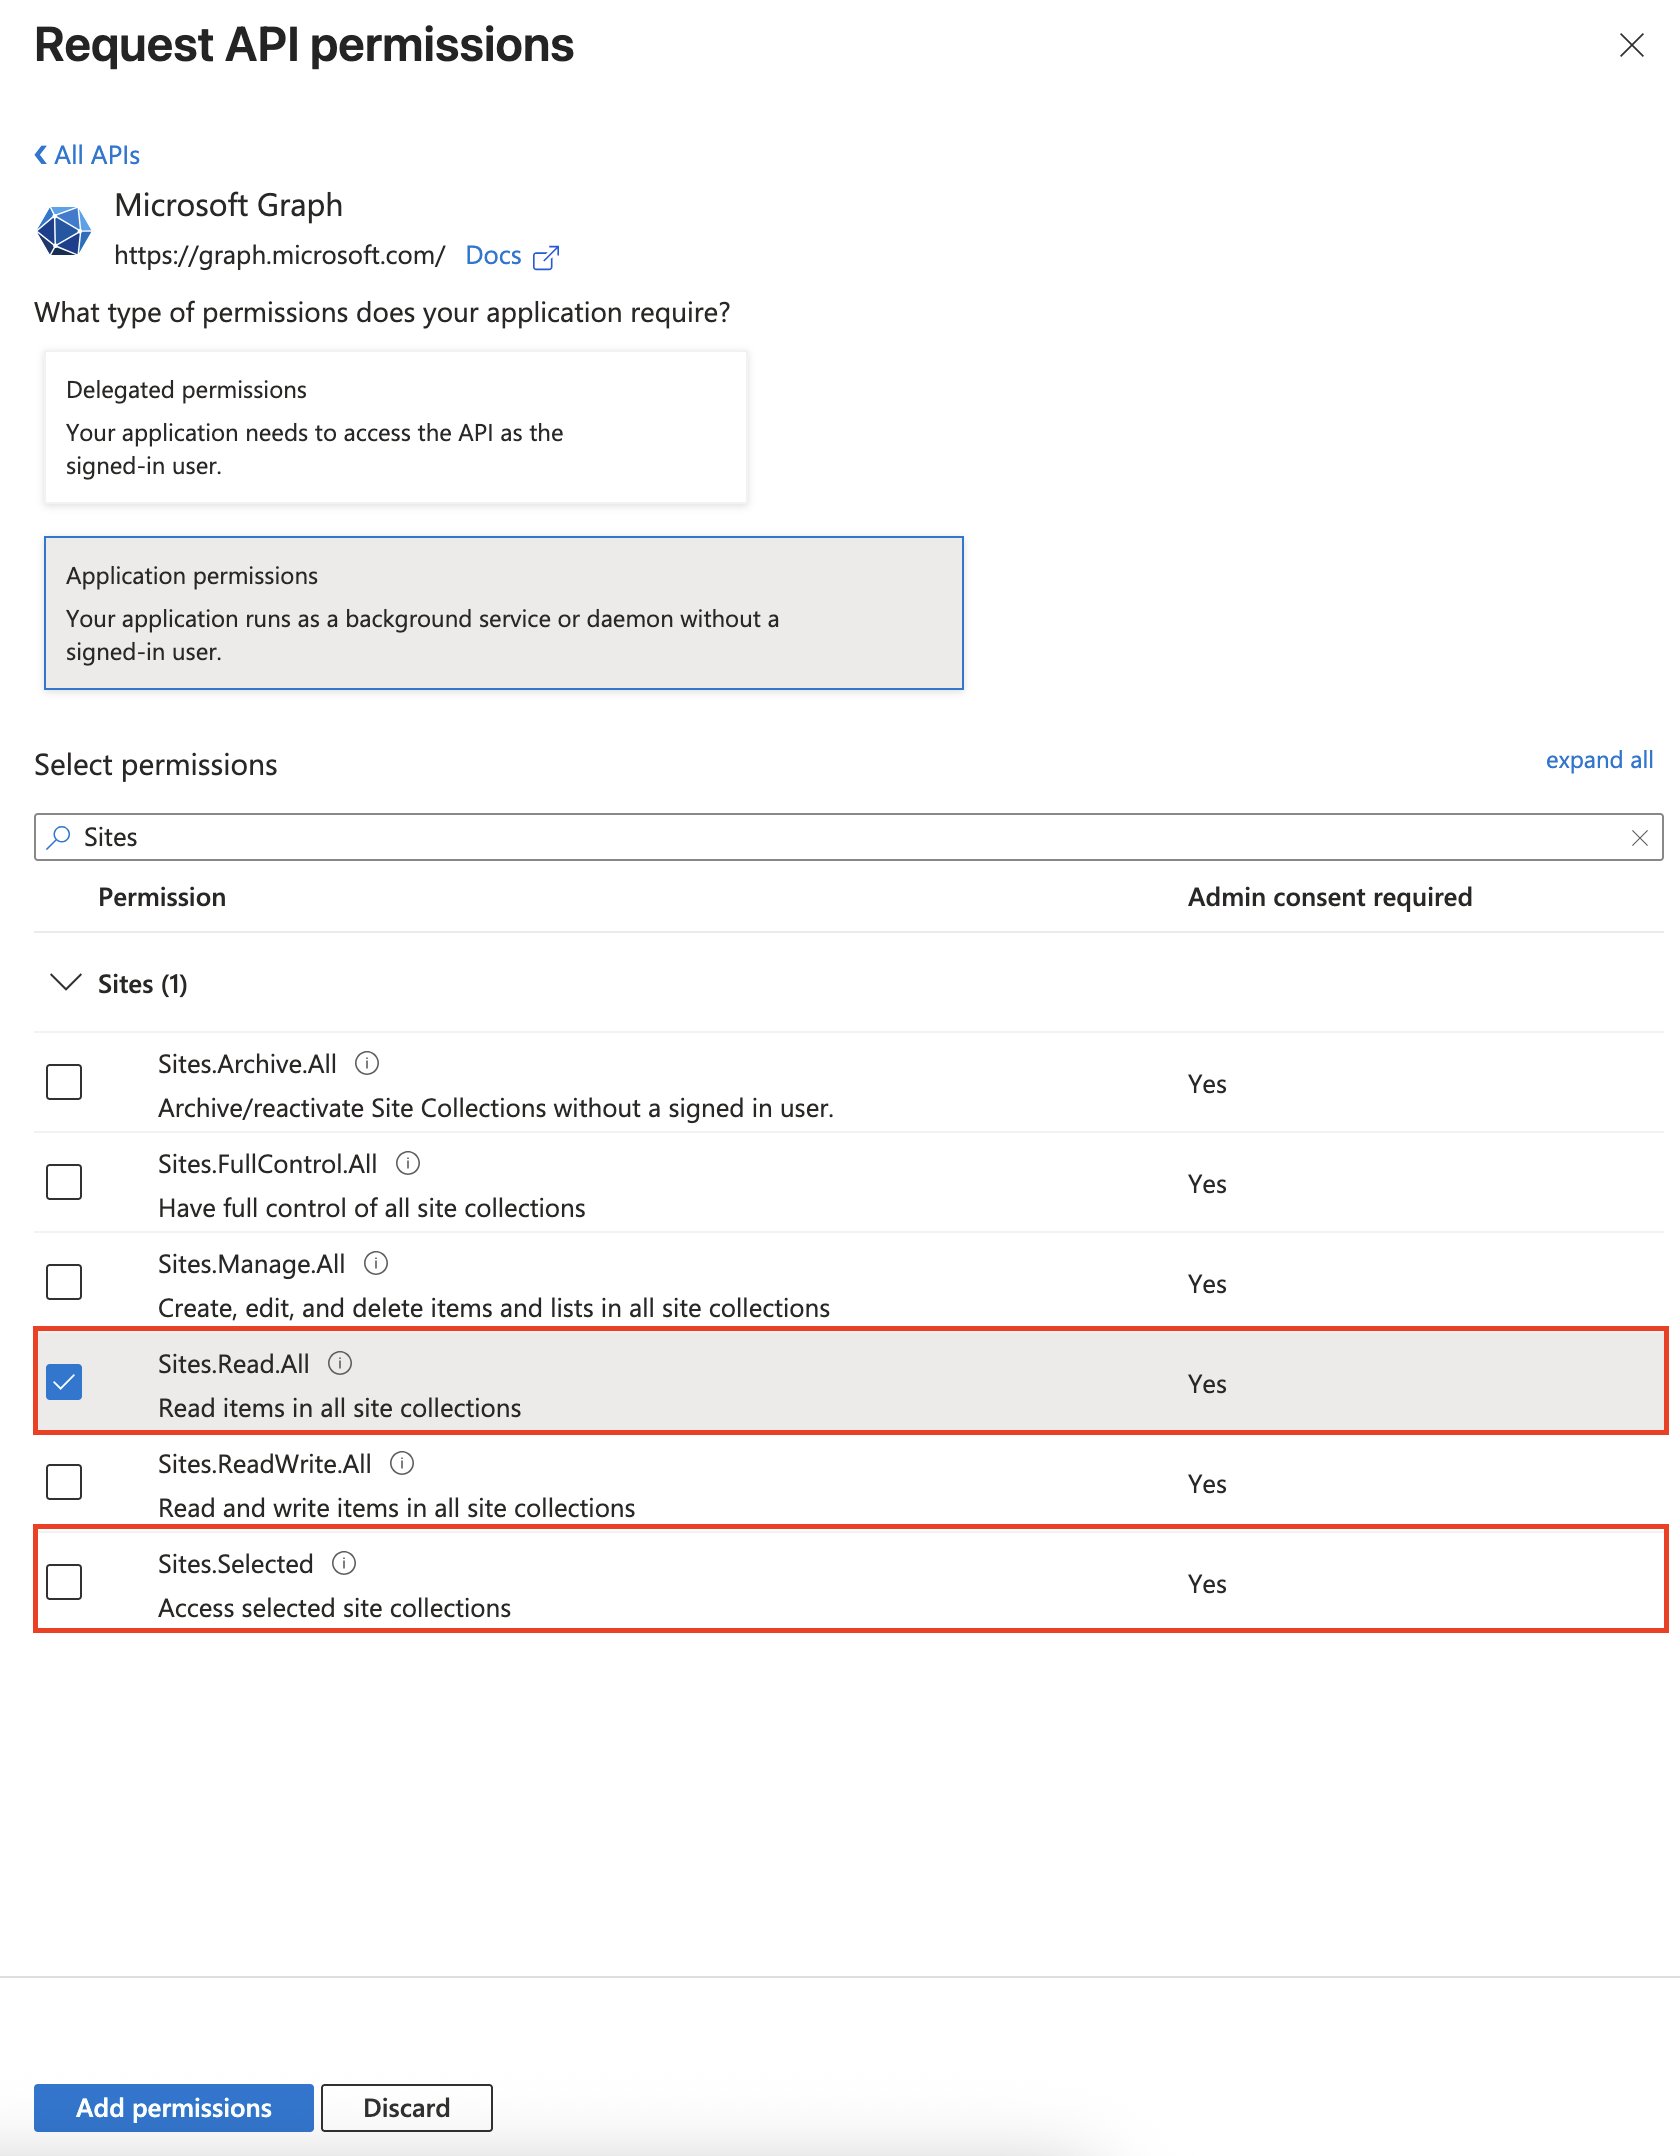
Navigate to API permissions in the left sidebar, then click Add a permission.
-
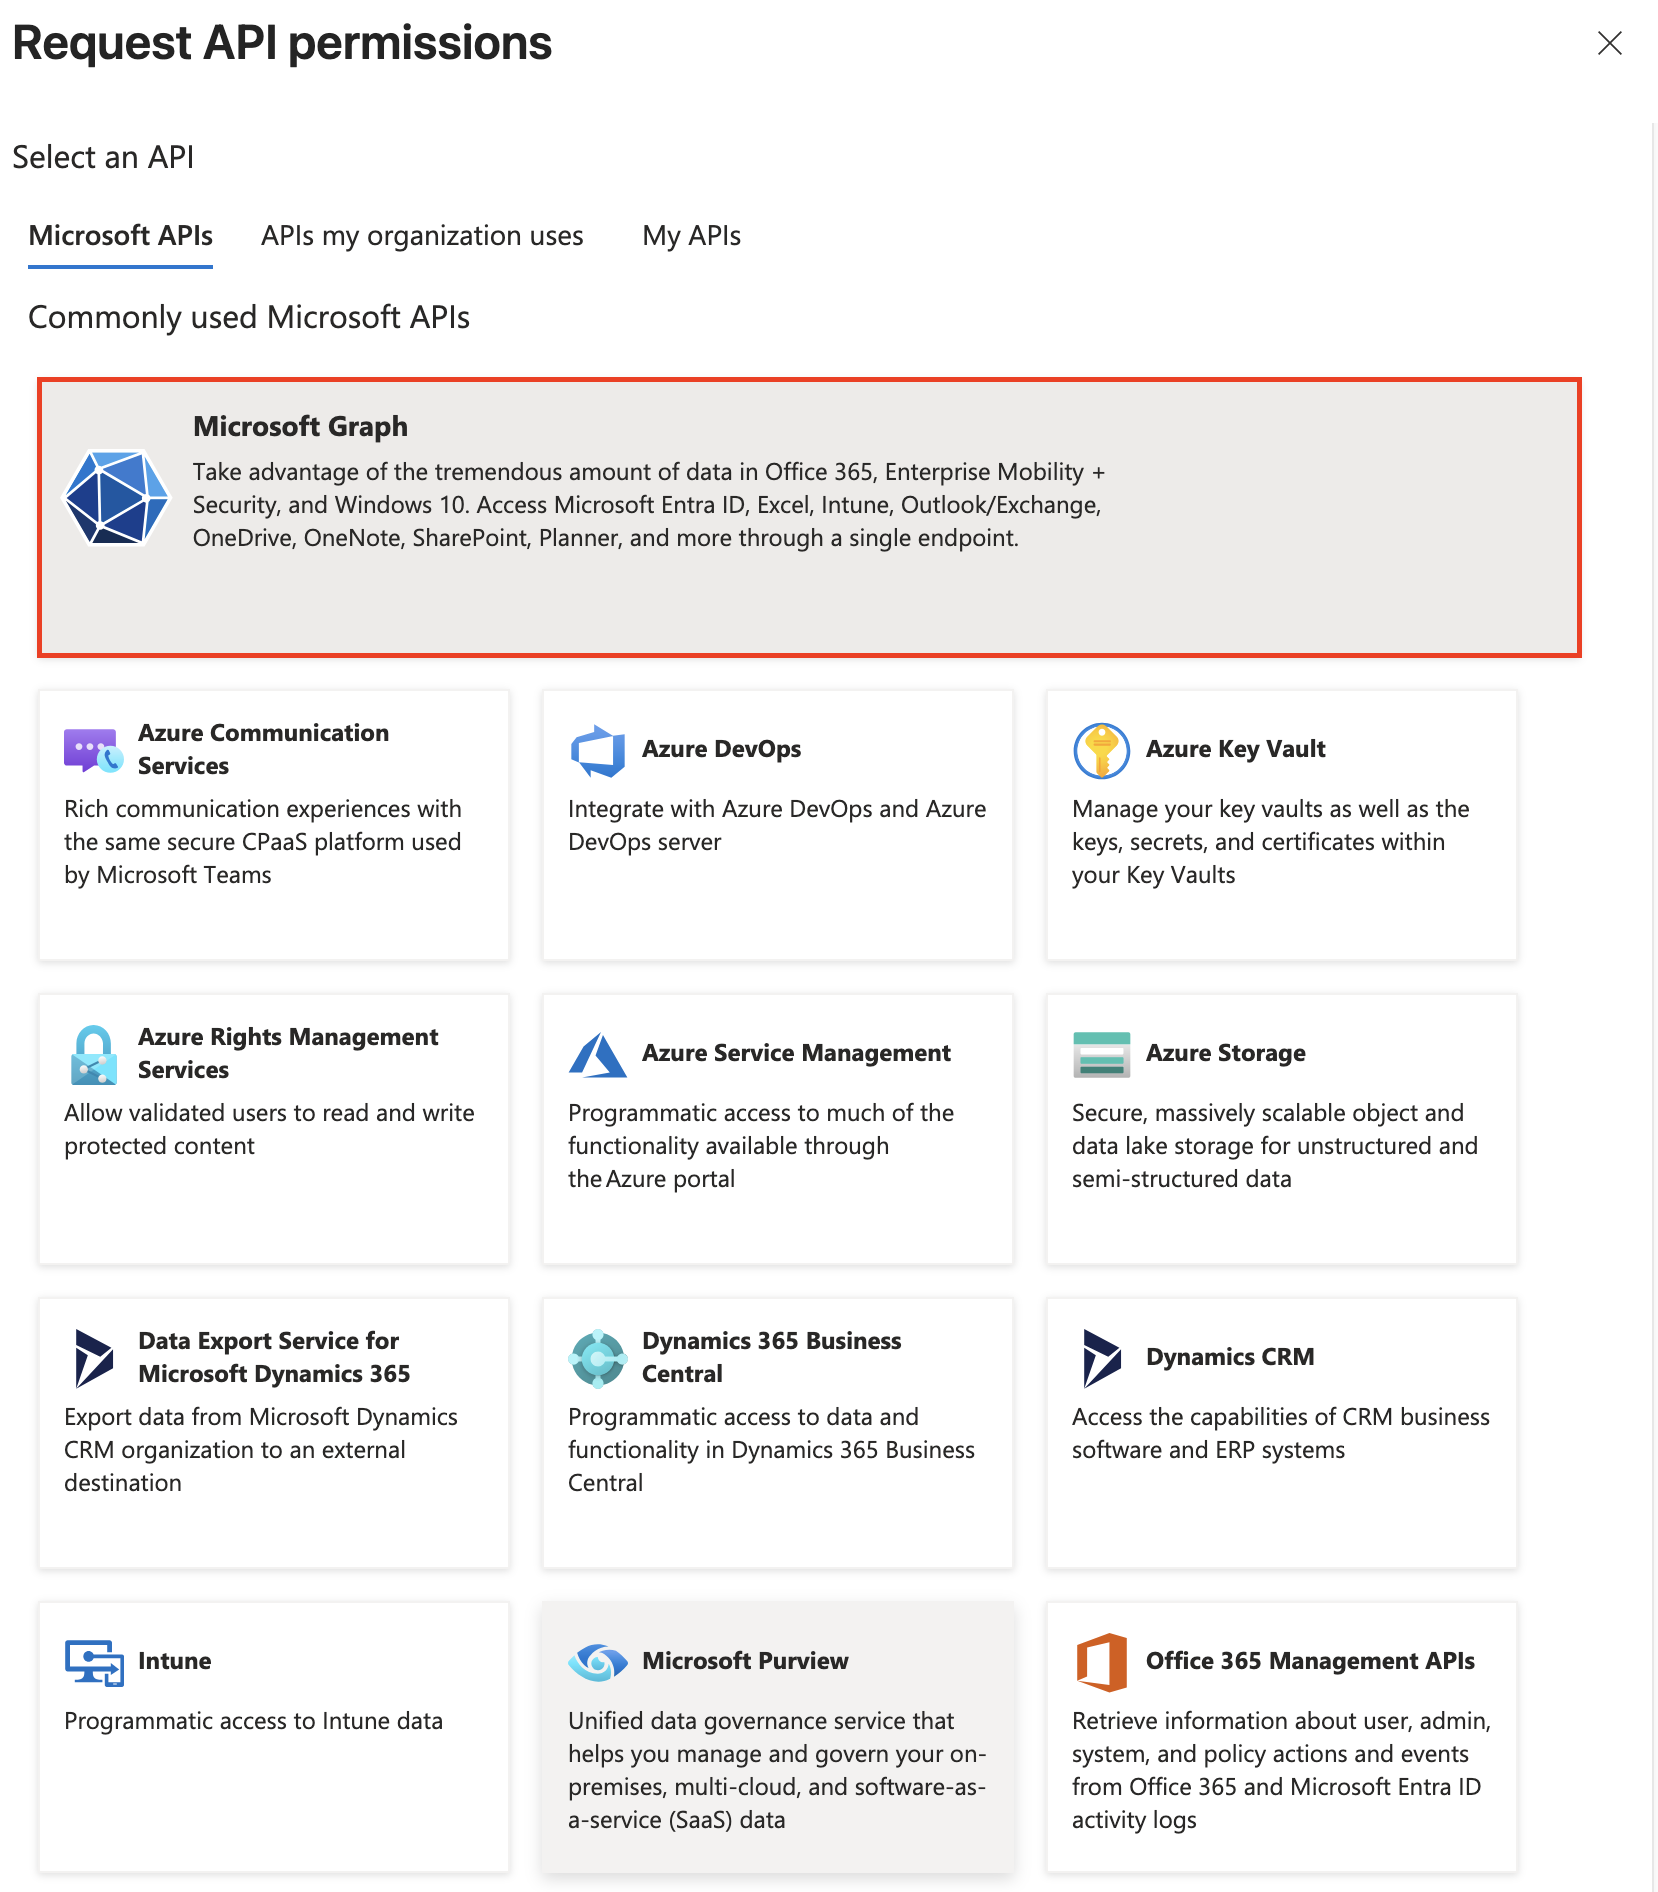
Select Microsoft Graph.
-
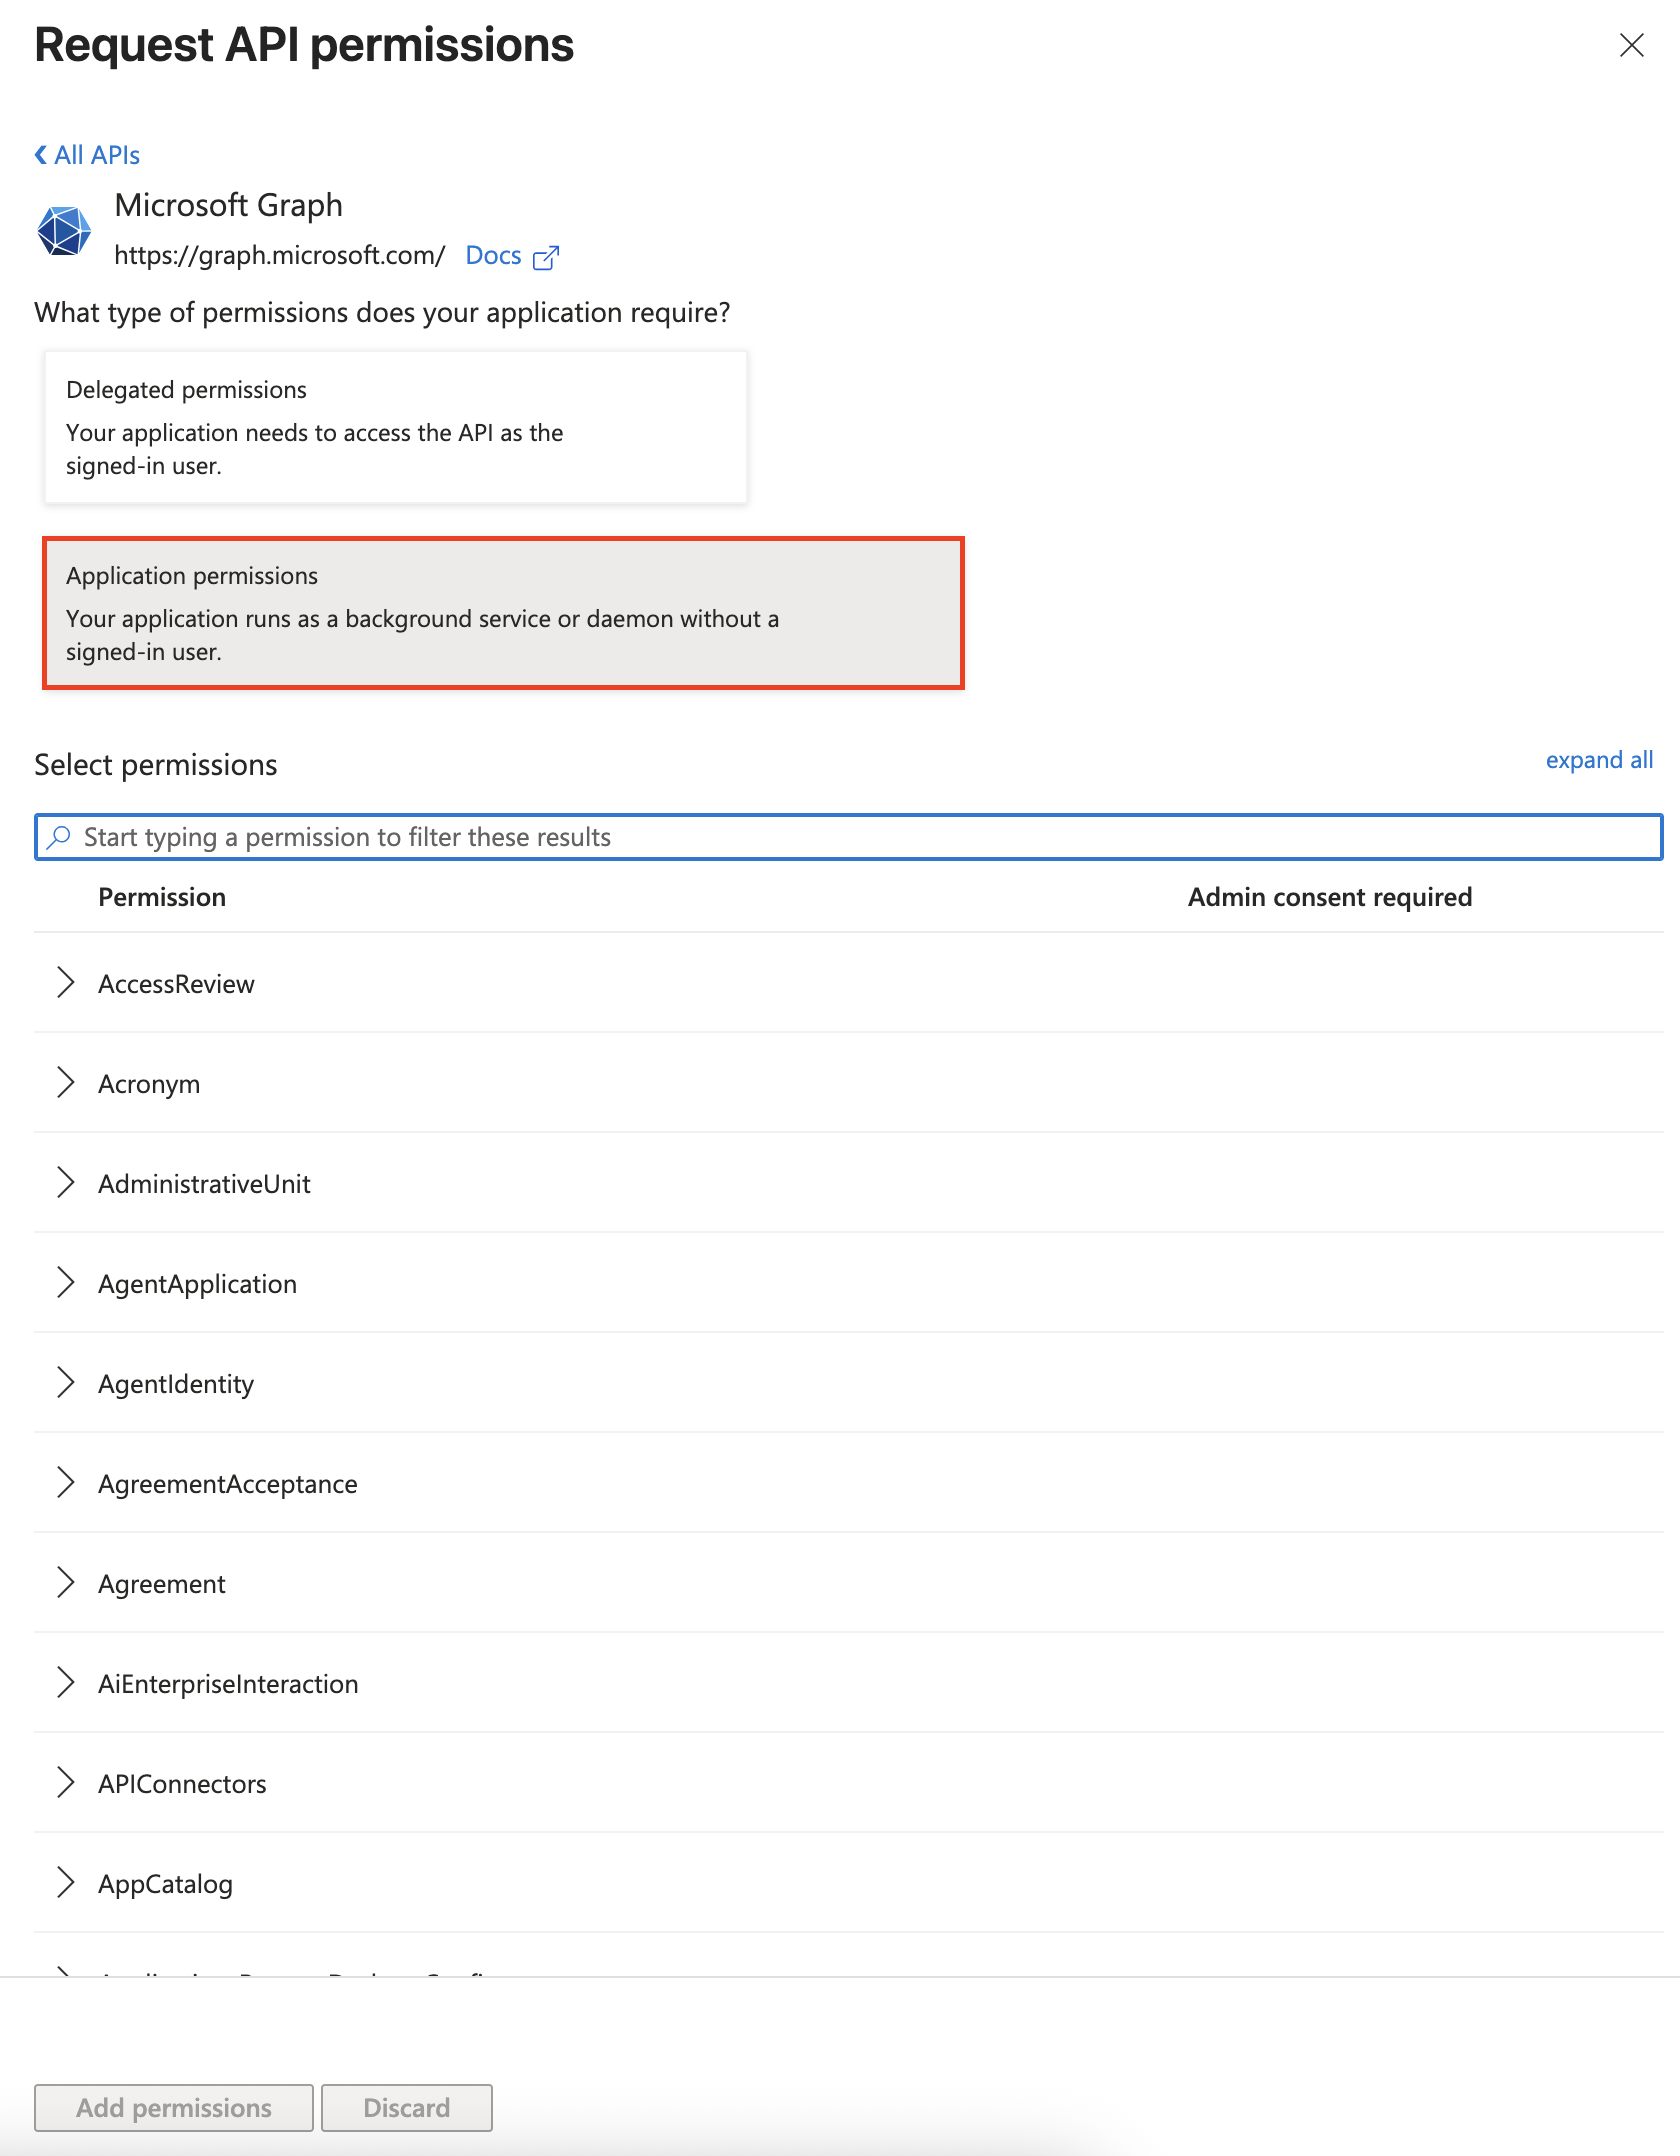
Choose Application permissions (not delegated).
-
Choose your access level:
- Option A (Full Access): Search for and select
Sites.Read.All(orSites.ReadWrite.Allif Findable should write back to SharePoint). If you choose this option, skip ahead to Step 3. - Option B (Limited Access): Search for and select
Sites.Selected. Continue with step 5 below.
- Option A (Full Access): Search for and select
-
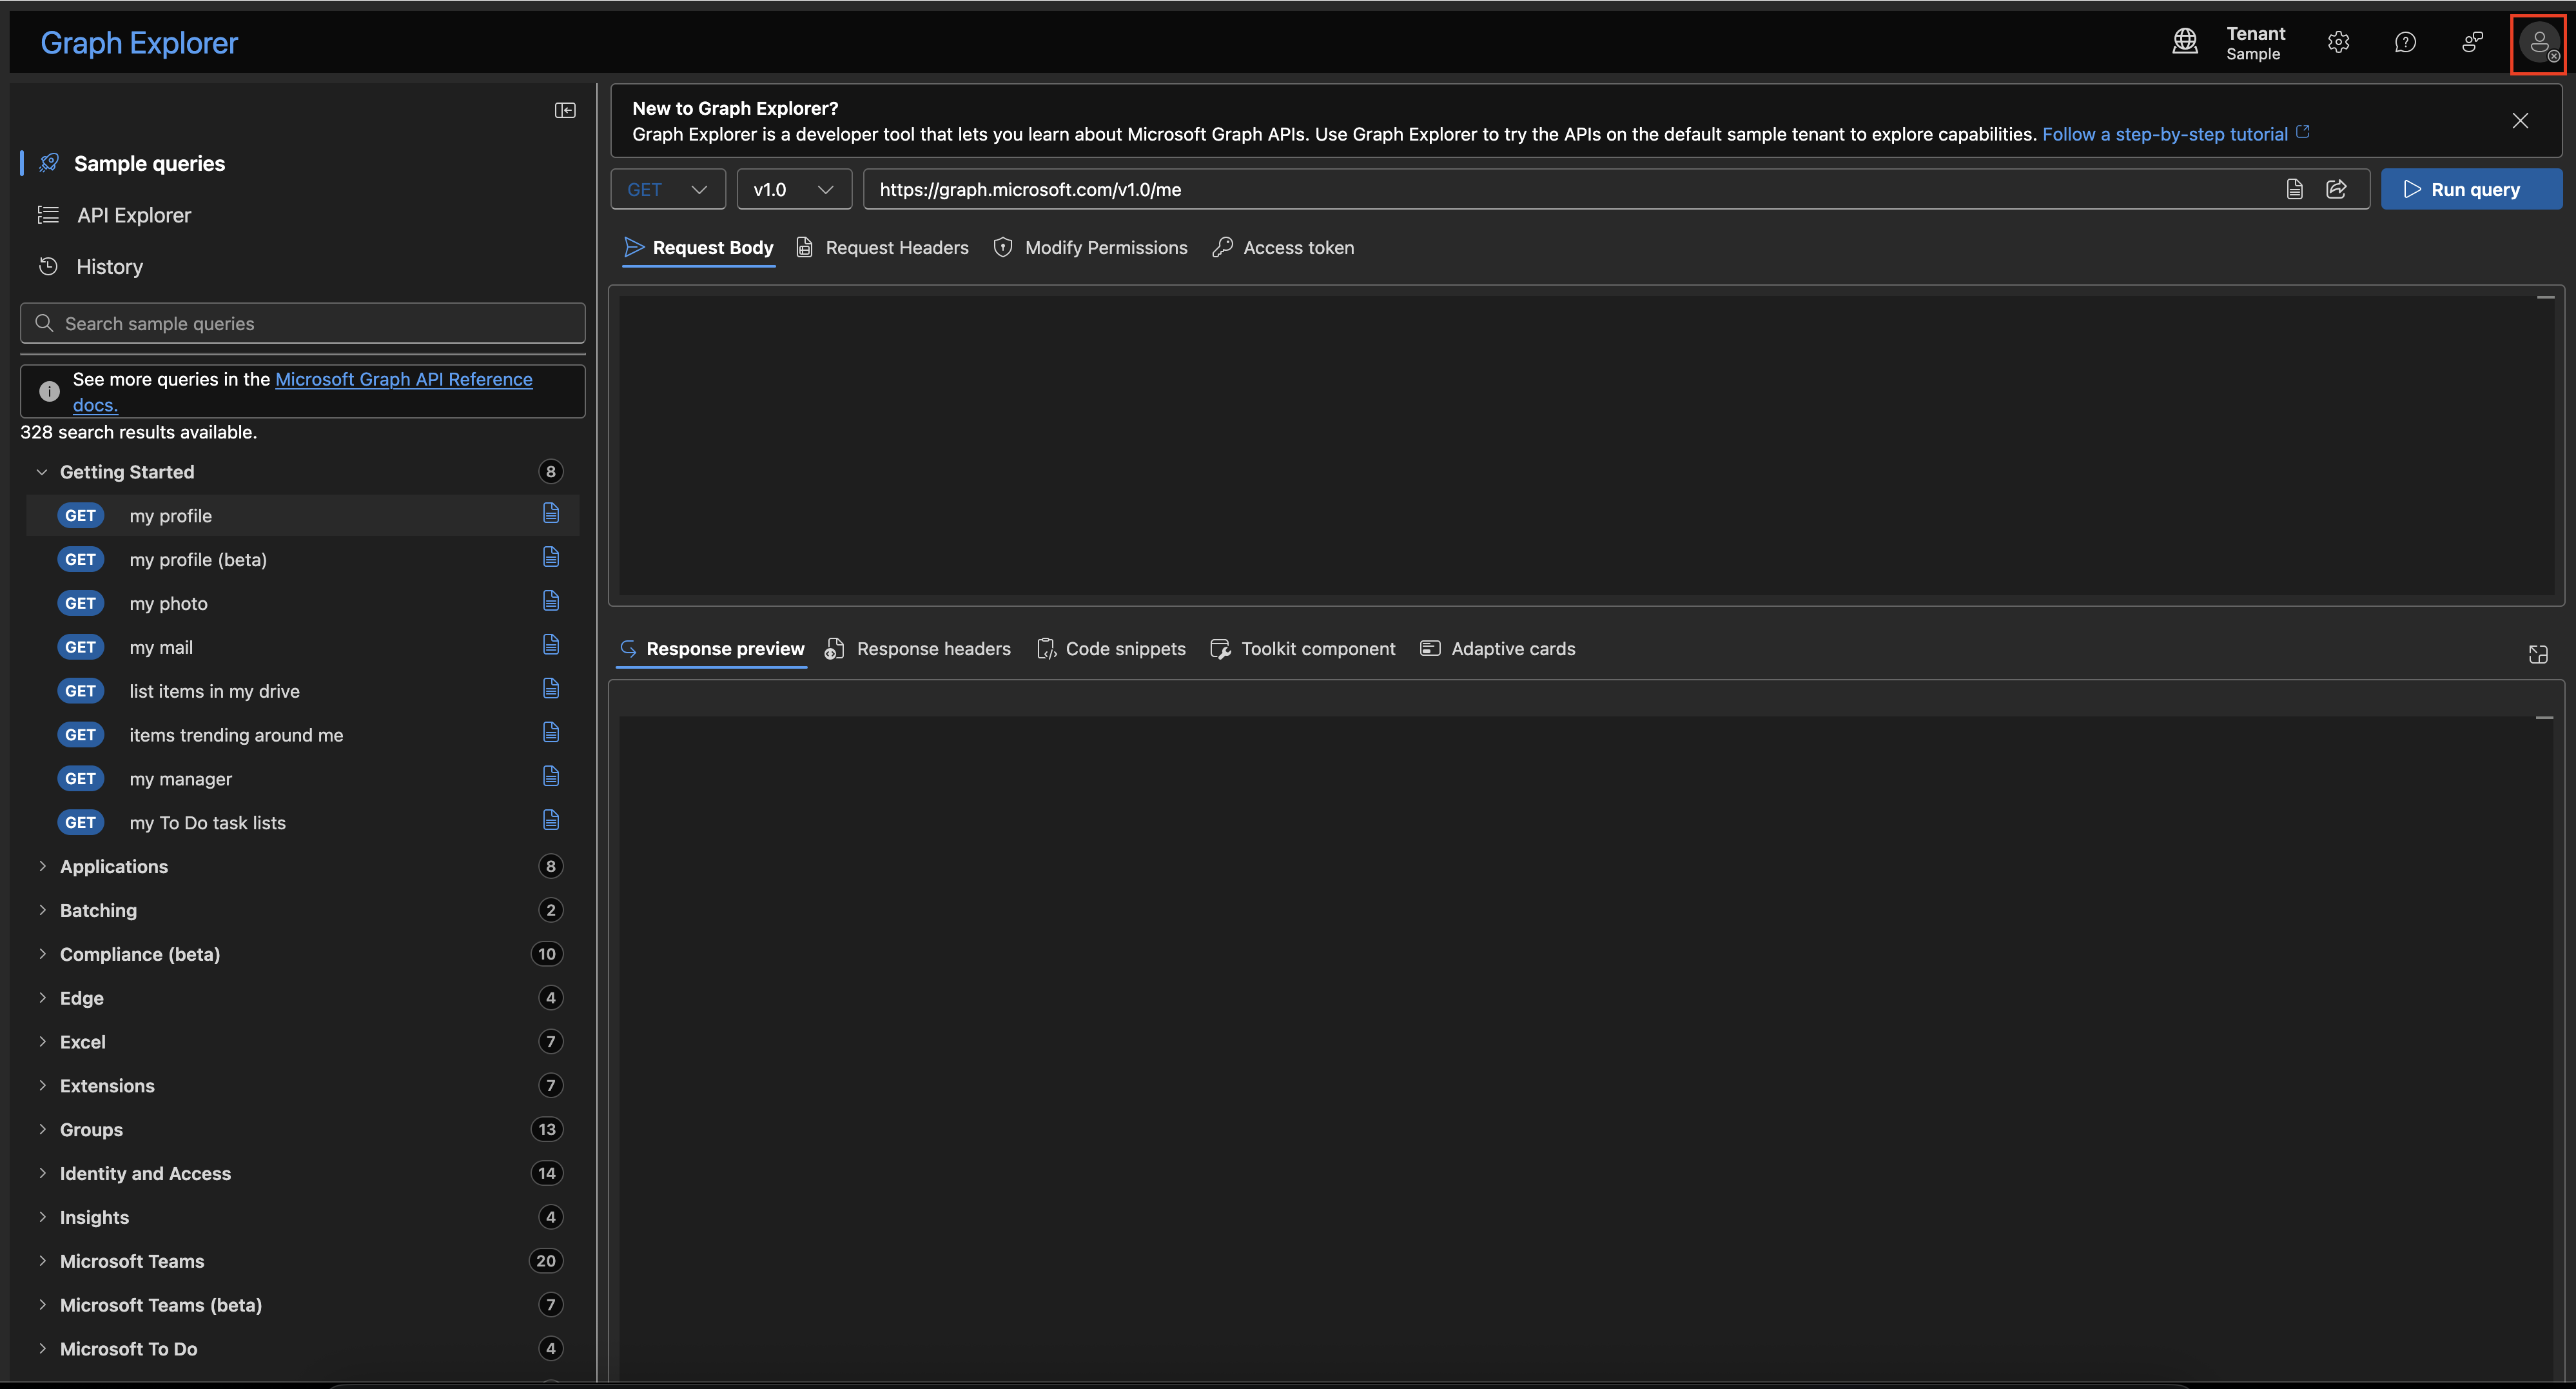
(Sites.Selected only) Open the Microsoft Graph Explorer and sign in with your admin account.
-
(Sites.Selected only) Find the ID of the SharePoint site you want Findable to access. Send a GET request to:
https://graph.microsoft.com/v1.0/sites/{tenant-name}.sharepoint.com:/sites/{site-name}Replace
{tenant-name}with your organization’s SharePoint tenant name and{site-name}with the site name (remove any spaces).Copy the
idfrom the response.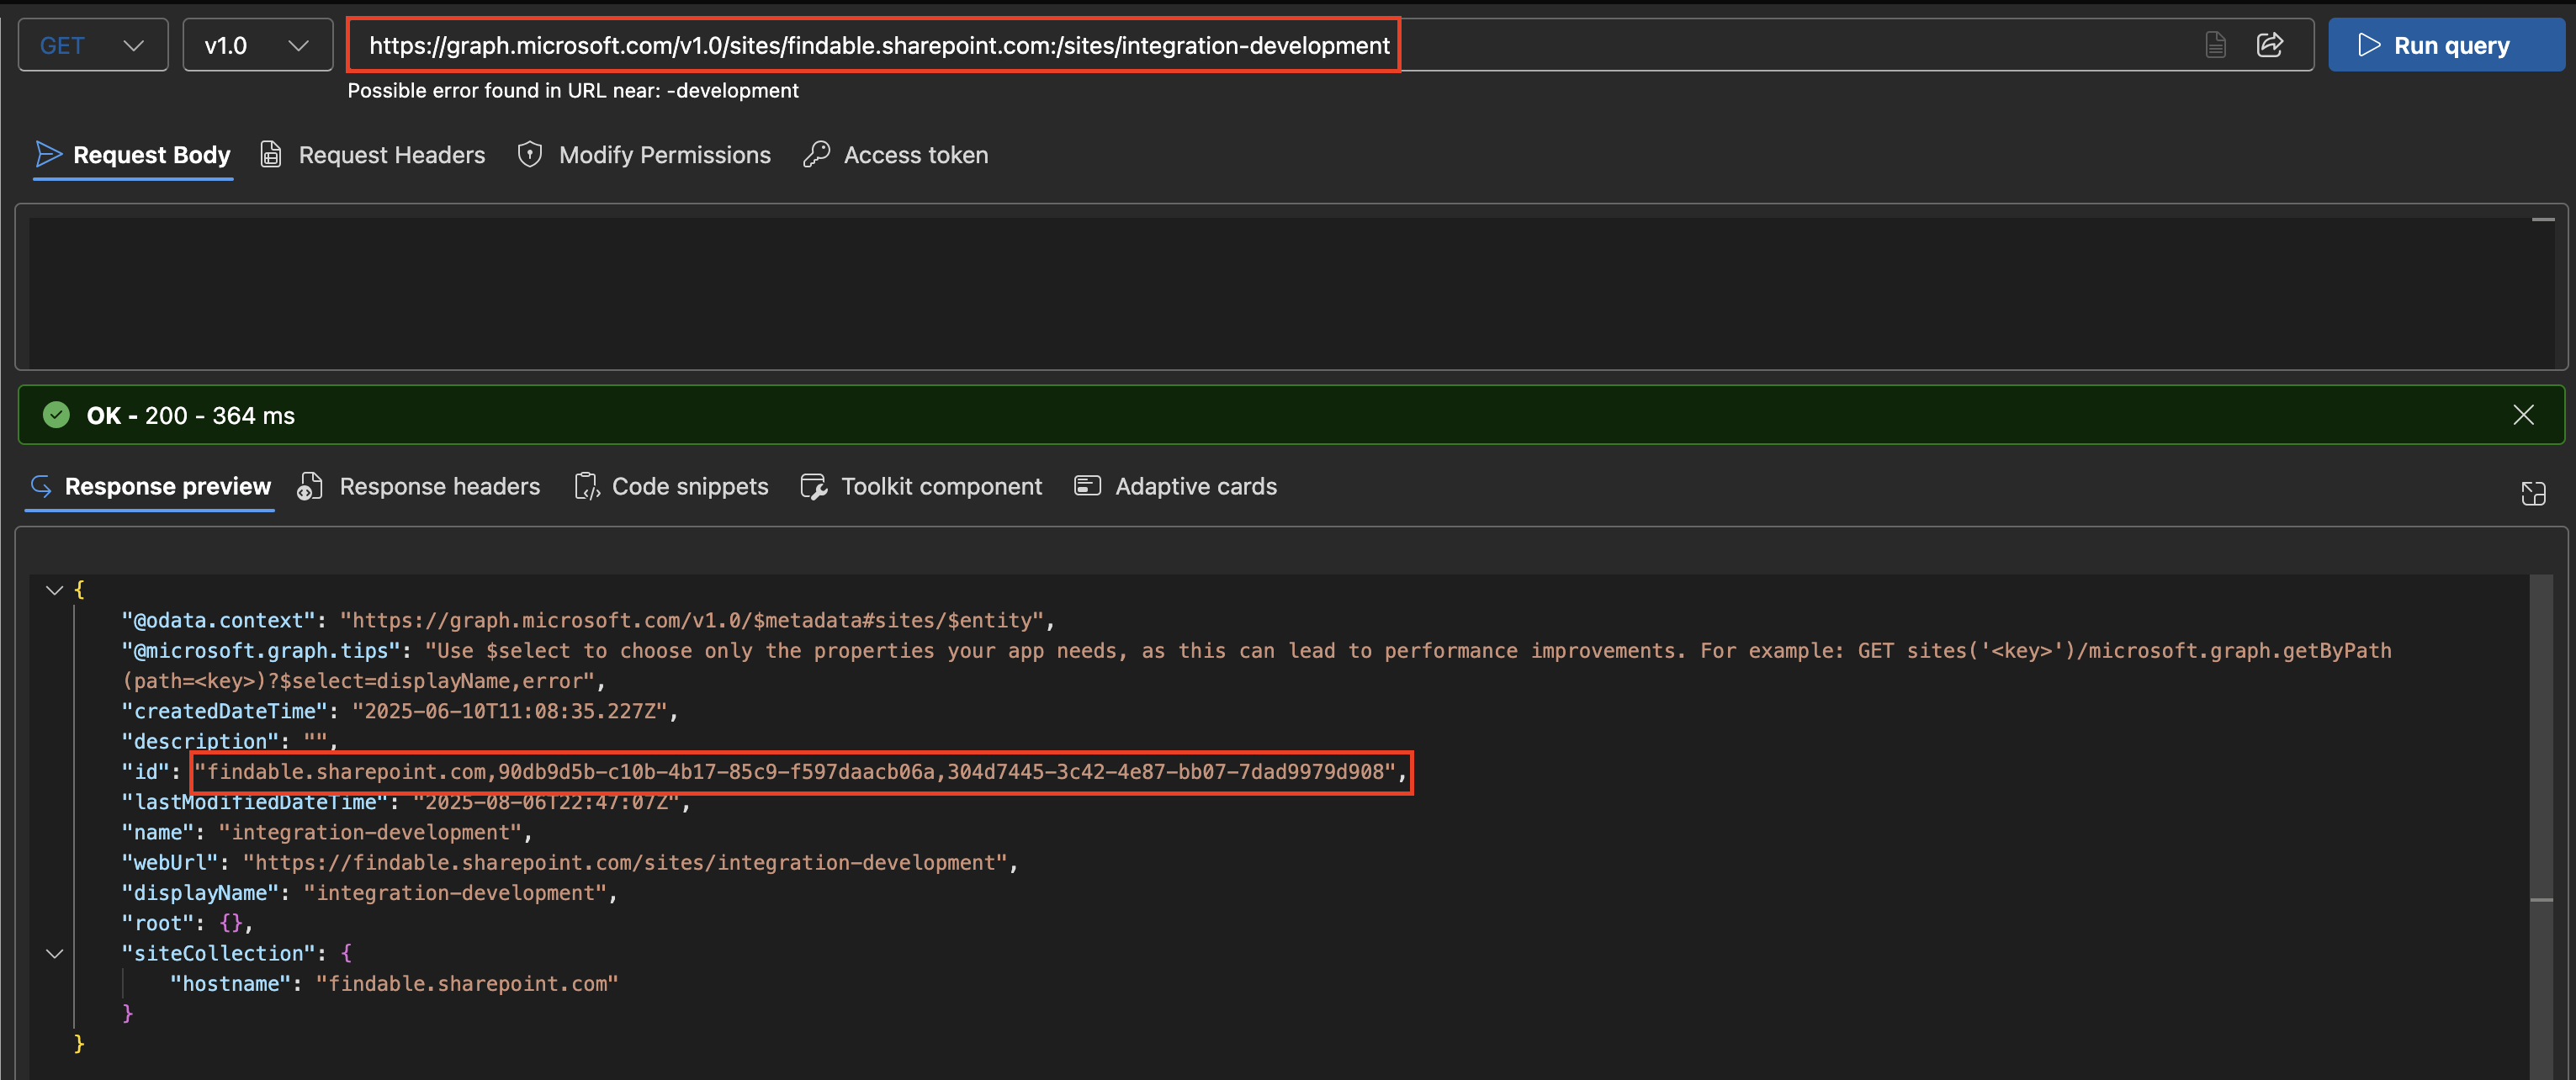
-
(Sites.Selected only) Grant Findable access to this site by sending a POST request to:
https://graph.microsoft.com/v1.0/sites/{site-id}/permissionsWith this request body:
{
  "roles": ["read"],
  "grantedToIdentities": [
    {
      "application": {
        "id": "{application-id}",
        "displayName": "{application-name}"
      }
    }
  ]
}
Replace
{site-id},{application-id}, and{application-name}with your values. Use"write"instead of"read"if Findable should have write access.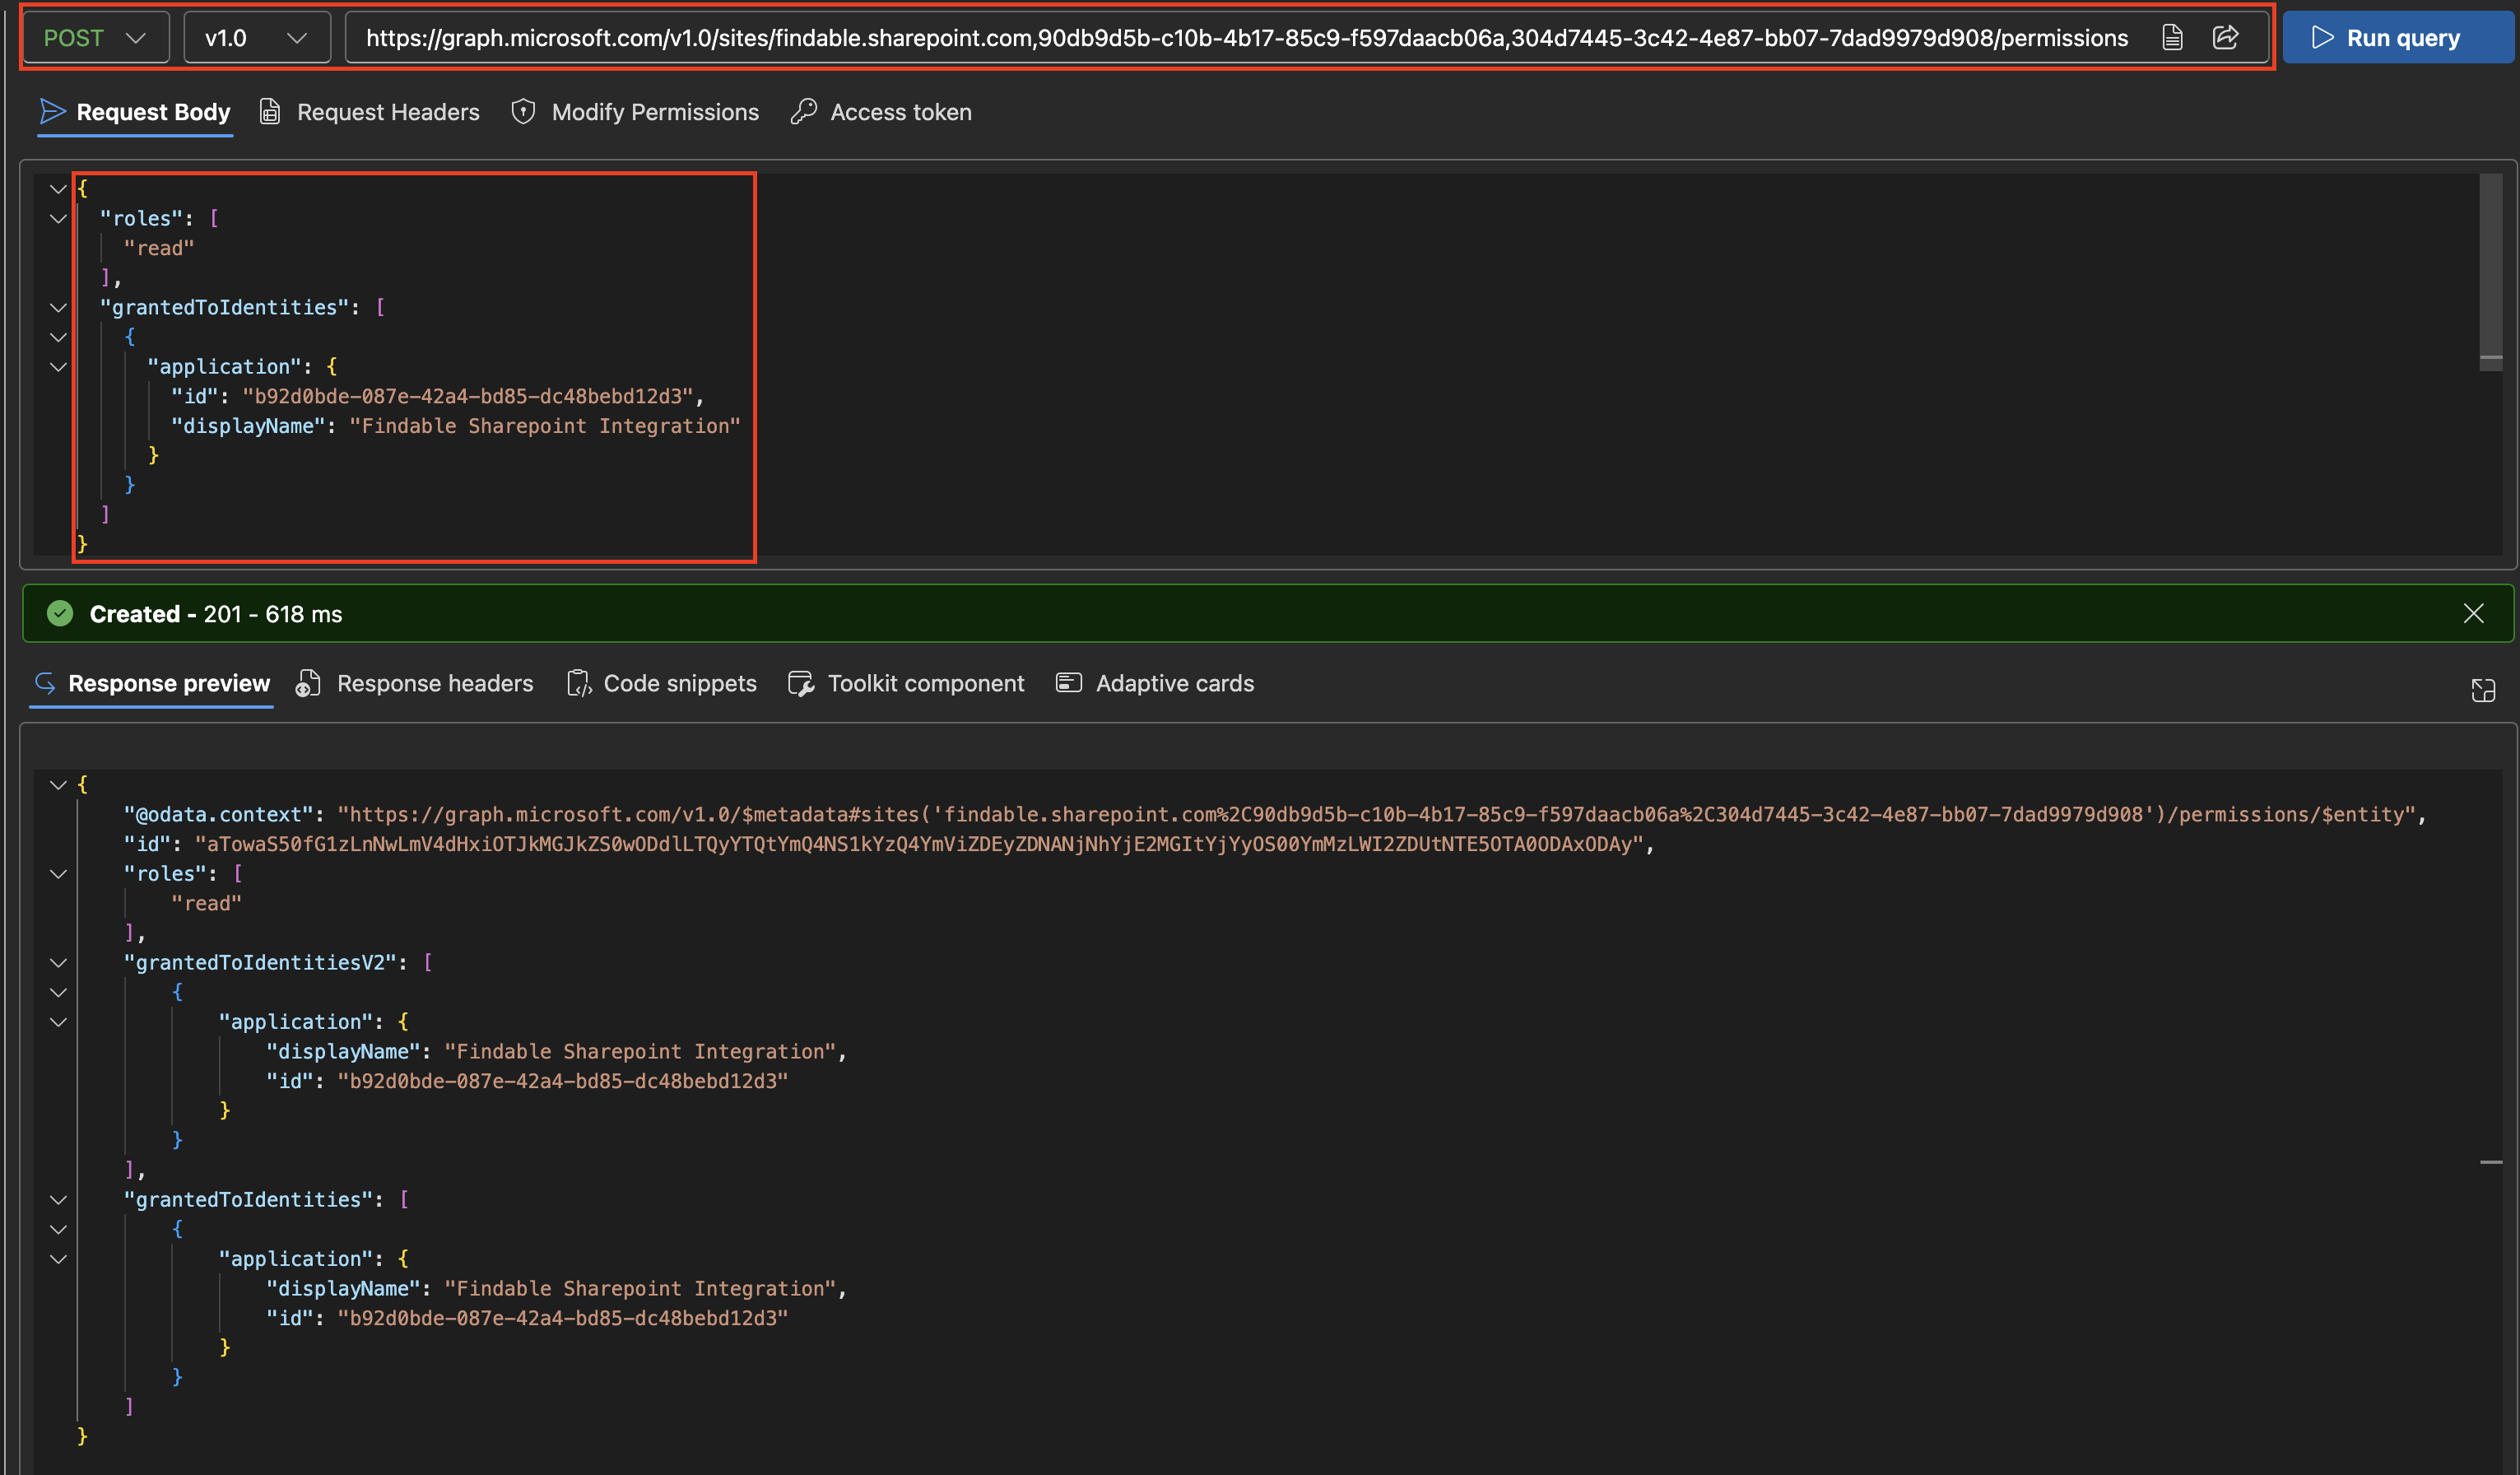
-
Repeat steps 6-7 for each SharePoint site you want Findable to access.
Step 3: Enter Credentials in Findable
-
Sign in to app.findable.ai with an account that has administrator permissions in your Findable organization.
-
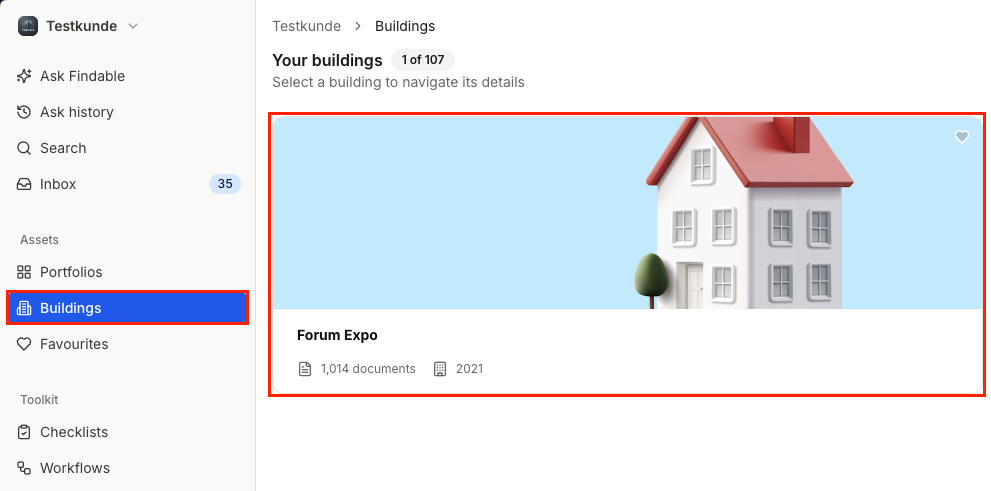
Navigate to any building in your portfolio.
-
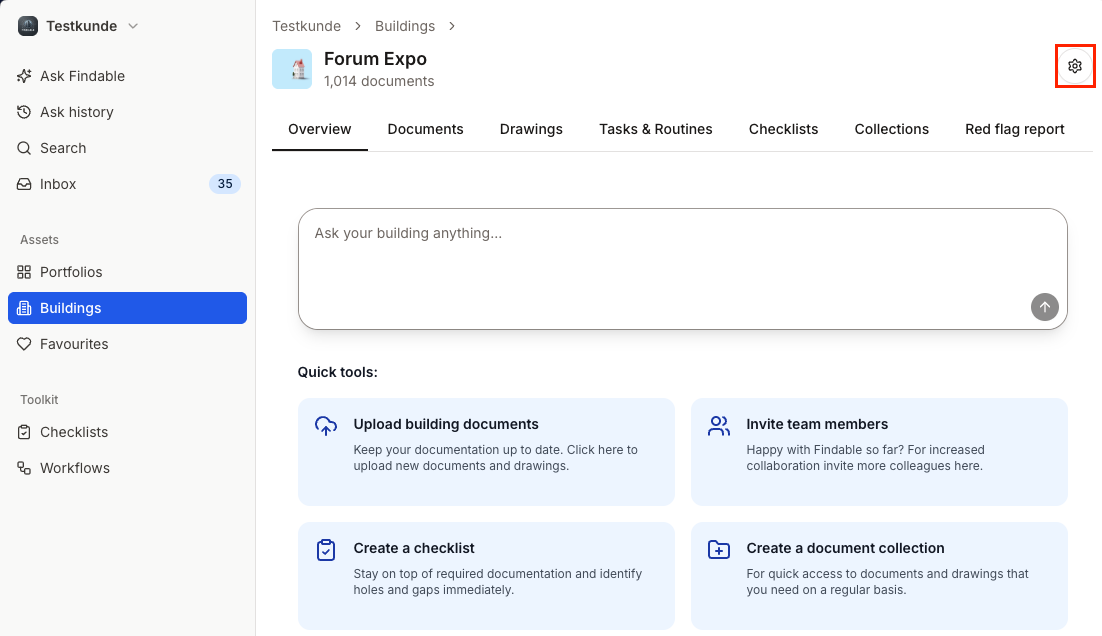
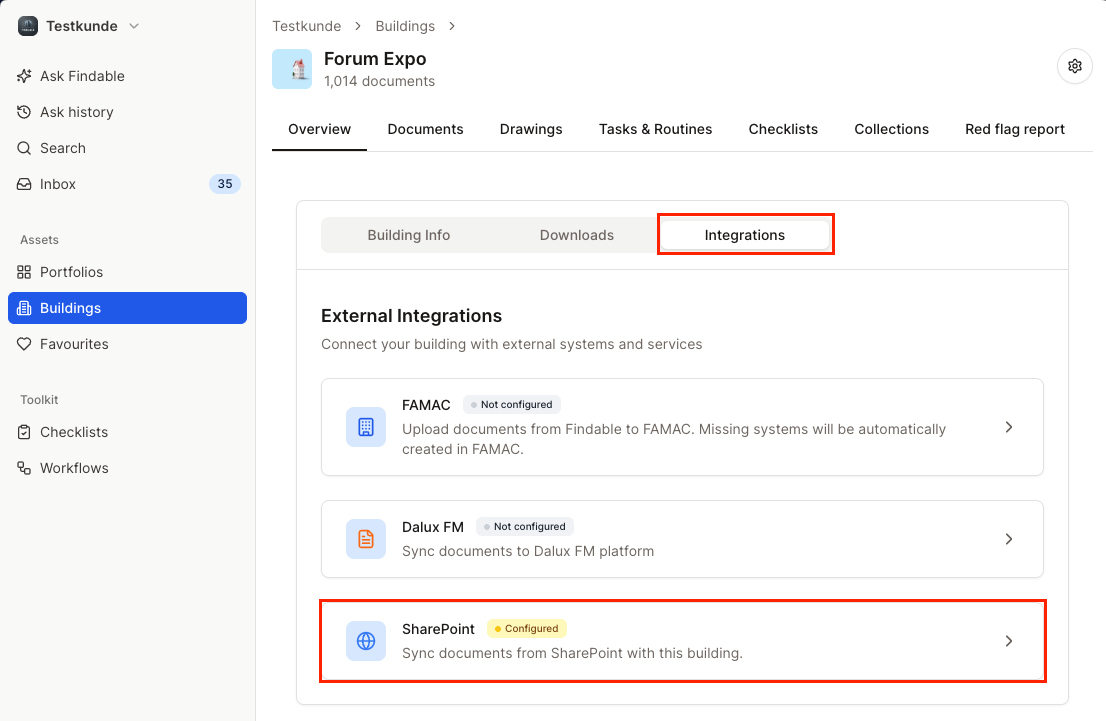
Open the building’s settings/edit screen and select the Integrations tab.
-
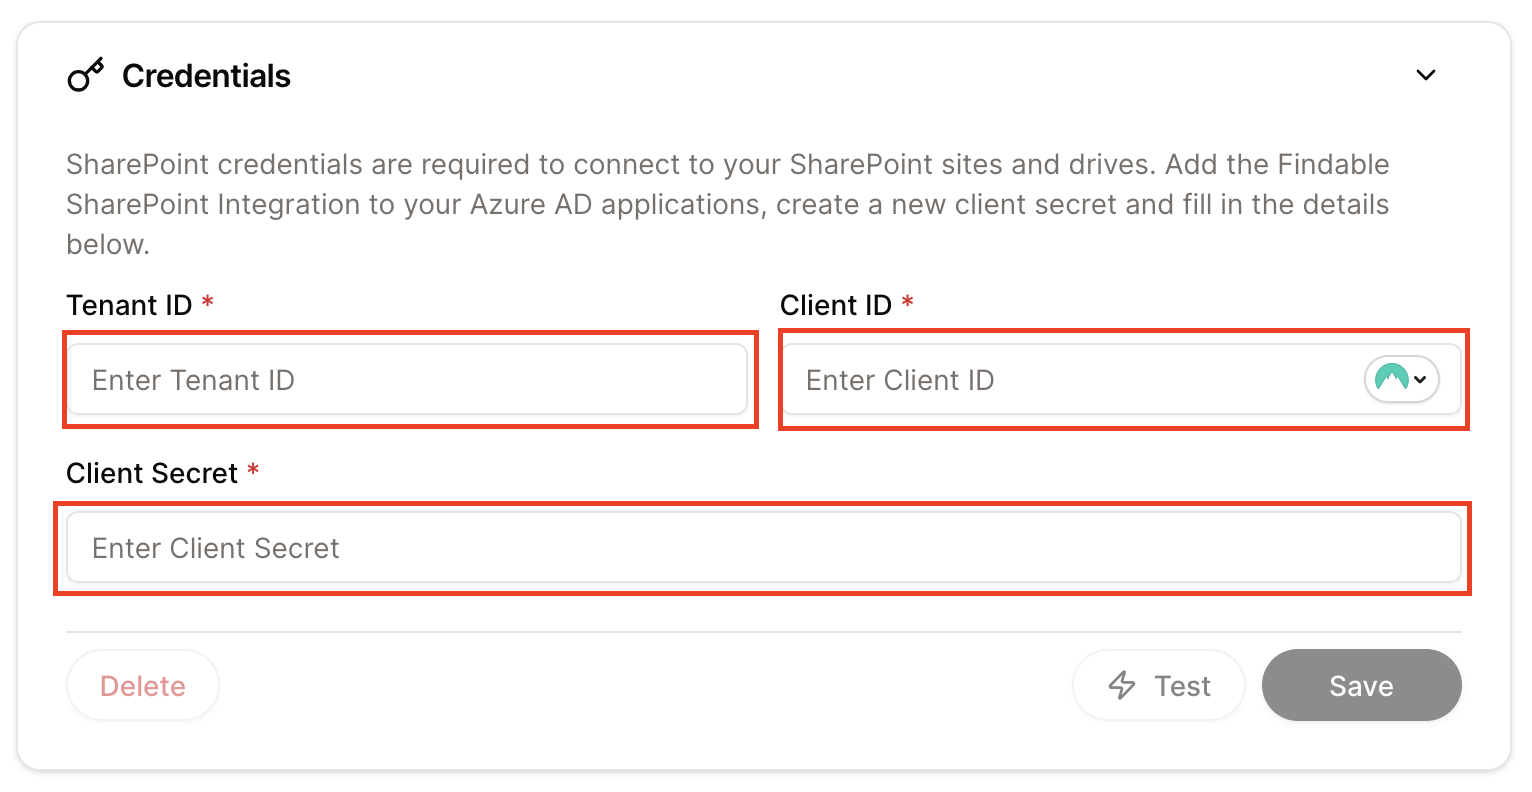
Expand SharePoint, then open the Credentials section. Enter your credentials:
- Tenant ID: Your Microsoft 365 tenant ID
- Client ID: The Application (client) ID from Step 1
- Client Secret: The secret value you copied in Step 1
Click Save.
-
Click Test to verify the connection.
-
Optional: if your setup should export documents back to the same SharePoint drive by default, configure Default Export Drive in the same Credentials section. You can still override the export destination per building later.
The credential set is organization-wide. You only need to create it once, and then building administrators can connect SharePoint sources for each building.
Step 4: Create a SharePoint Subscription
Subscriptions tell Findable which SharePoint source should feed a specific building.
- Stay in the building’s Integrations tab and keep the SharePoint card expanded.
- In the subscriptions area, click Create First Subscription or Add Subscription.
- Select the SharePoint site. If the app registration uses
Sites.Selectedand the site cannot be listed automatically, choose the manual URL option and paste the SharePoint site URL. - Select the drive or document library.
- Choose the sync scope:
- Entire drive: import all supported documents in the selected drive.
- Selected folders: import only the selected folders and their subfolders.
- Review the subscription and click Create Subscription.
Findable starts the first sync automatically. Folder-scoped subscriptions trigger a forced re-sync so files that were previously skipped can be processed.
Step 5: Configure SharePoint Export
Use this only when documents or metadata should be written back to SharePoint.
- In the SharePoint card, open Export.
- Turn on Enable export.
- Choose the export destination:
- Use the organization’s Default Export Drive, if one is configured.
- Or click Set up export destination / Override for this building and select a site, drive, and folder for this building.
- Click Export to SharePoint to export new documents.
- Use Re-export All when you need to refresh metadata for documents that were already exported.
The export status shows how many building documents are present in SharePoint and updates while an export is running.
Need Help?
If you run into issues during setup, reach out to our team at support@findable.ai or use the chat widget in the bottom-right corner of the Findable app.